Recent Posts

Sunday, December 2, 2012

New Blog & Shop Announcement


Hi all!

Firstly, thank you so much for following Living with Annie! This blog was a wonderful project I undertook from 2009-2010 and an amazing experience.

I'm delighted to announce that I have begun a new blog and opened a new online store called anniemade.

When you have a moment, I invite you to visit and check us out! 

You'll find a lot of the same things you enjoyed about Living with Annie, just kicked up a notch with better photography and more DIY fun. And in our shop, you'll find thoughtful gifts for your loved ones.

Hope you come to visit and subscribe! And thanks again for all your support on this crazy journey of life. 

Find us online at
www.somethinganniemade.com

Facebook at
www.facebook.com/somethinganniemade

Pinterest at
www.pinterest.com/anniemadepins

Tuesday, April 12, 2011

Peeps and Up!

A Peep Diorama - I kid you not.


Thursday, March 10, 2011

A real-life Up house!


The amazing folks at National Geographic have managed to float a house using balloons just like the movie, "Up!"

Check it out- pretty incredible stuff.
http://blog.craftzine.com/archive/2011/03/up-inspired_flying_house.html
http://blog.craftzine.com/NationalGeographicChannel7.jpg

Tuesday, March 8, 2011

New Wedding Blog - Planning with Annie

I'm very excited to announce I'll be shifting gears to a new blog all about wedding planning. Bridal magazines, beautiful blogs, crazy DIY ideas and more are dominating my mind these days so I figured I might as well share them with you. Hop on over if you're so inclined.

{http://planningwithannie.blogspot.com}

I'll still update LwA from time to time but for the next year or so- my heart's with my fiance and planning our big day! Here's hoping that Gus doesn't mind a year of intense crafting and ensuing craziness.

Thursday, January 27, 2011

Too good to be true

Hi all,

Lately, I've had so much to celebrate and be grateful for in my life. This past weekend, I've become even more incredibly lucky.

For those of you who enjoy a great surprise proposal, I invite you to check out what I've been up to lately and the latest in my life via the video below!


Tuesday, January 11, 2011

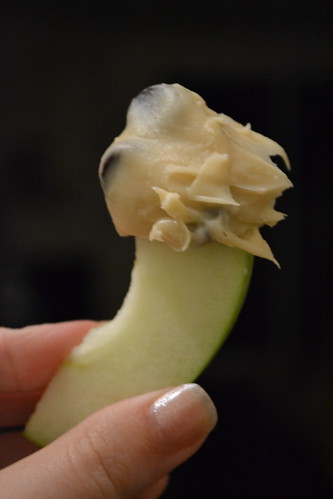
Cookie Dough... Dip


Scientists have done many important things, admittedly, but their latest discovery is one I wish I'd thought of long ago - CHOCOLATE CHIP COOKIE DOUGH DIP! All the great things about cookie dough - the texture, the flavor, the sinfulness - without all the health hazards of cookie dough - i.e. raw eggs and wheat flour (for Gus)!


I stumbled upon this recipe while perusing Tastespotting and made my own modifications. Create, enjoy, improve and mangia people! This is some deliciously awesome stuff.


Ingredients:
- 1 pkg of cream cheese (8 oz)
- 1/4 cup powdered sugar
- 1/4 cup big granule white sugar (if you have it, otherwise increase powdered)
- 1 stick of butter (1/2 cup) 
- 3/4 cup brown sugar
- 3/4 cup of semi-sweet chocolate chips
- Any additional mix-ins you'd like!


Directions:
1. Melt butter on medium-low heat in a skillet. Add brown sugar and stir until butter browns and has a nutty aroma (you're creating brown butter). 
2. Set butter and brown sugar aside to cool. Combine cream cheese and remaining white and powdered sugar.
3. Add butter/brown sugar mixture to the cream cheese mixture. Combine and add chocolate chips/any other mix-ins.
4. Serve with sliced granny smith apples, graham crackers, or even a bagel! Hey, it's basically Cookie dough cream cheese after all! Nom!


Thursday, December 30, 2010

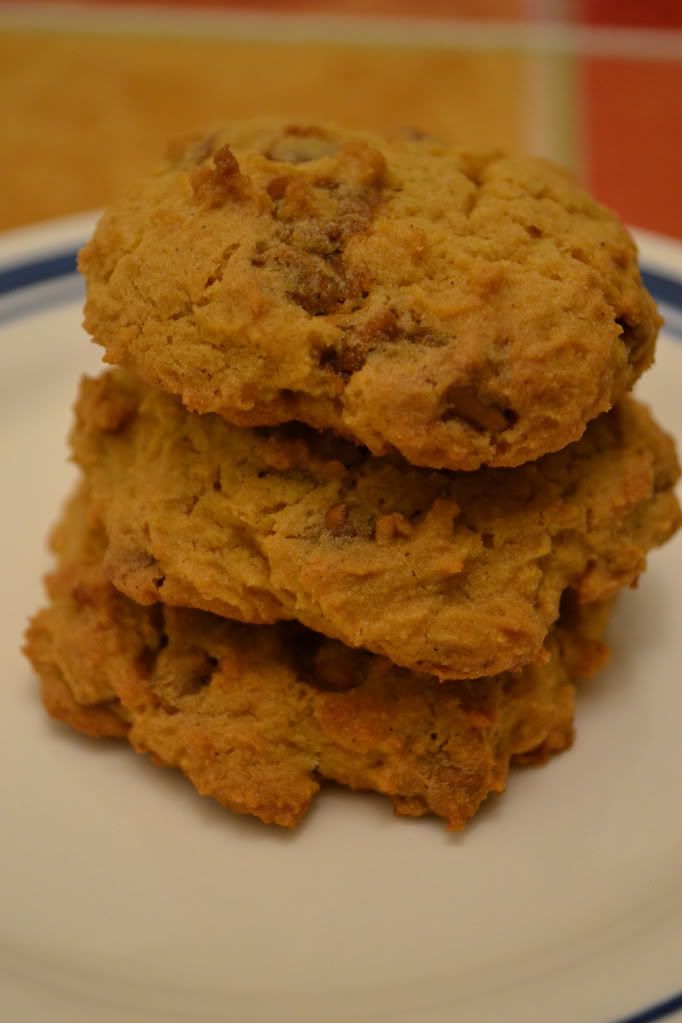
Om Nom Pumpkin Chip Cookies


Hope you all have had a wonderful holiday season! I've got a few treats in store including the news that I now have a blog-worthy DSLR camera to capture all my memorable moments.


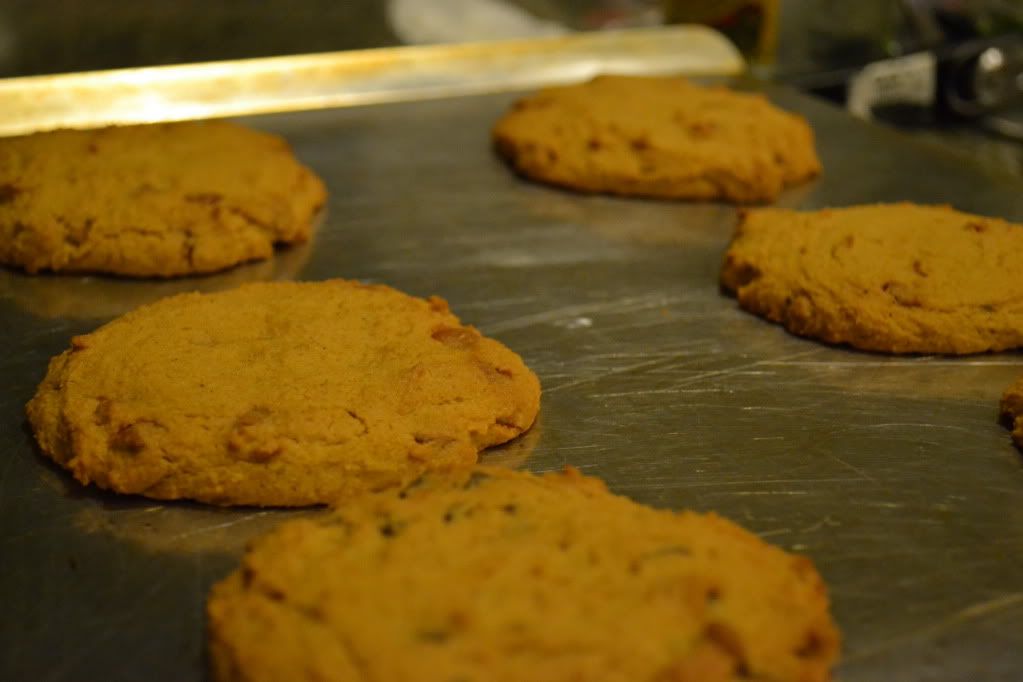
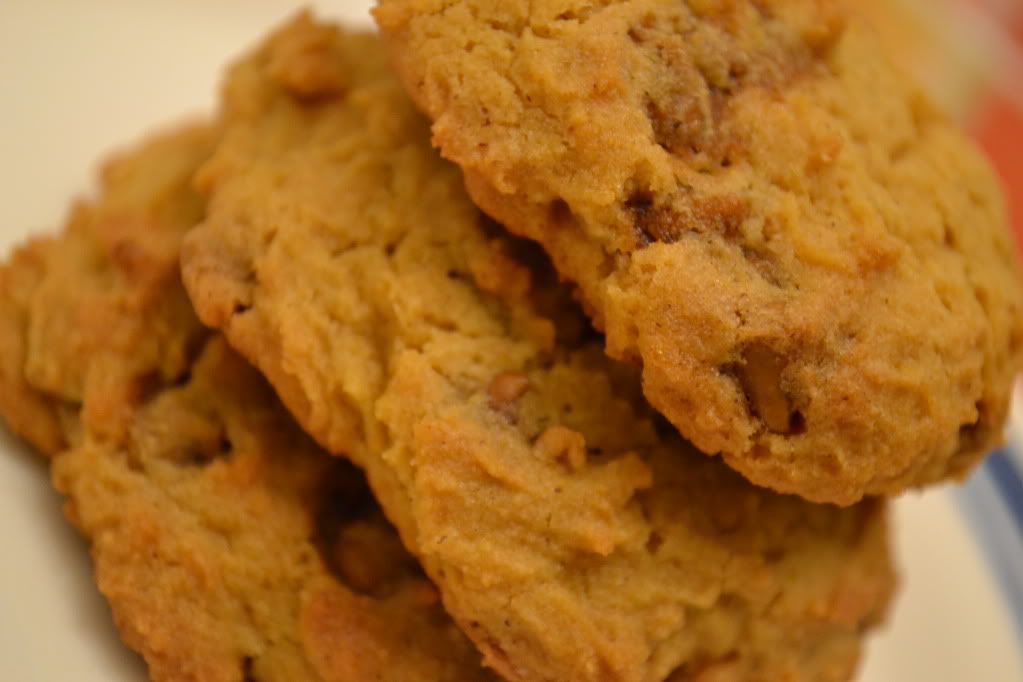
For Christmas Day this year, we managed to make some pretty amazing and somewhat healthy (cough, cough) cookies that were both gluten-free and DELICIOUS. They're very cake-y and moist and stay that way for days on end! The pumpkin flavor isn't too overpowering either. I mixed cinnamon chips in half the batch, chocolate chunks from Ghiradelli in another. Om nom, indeed.

Here's the recipe if you guys want to make these- I've adapted it slightly from this one at All Recipes and it can be made gluten-free or with regular wheat flour. I didn't make the icing glaze- it didn't need it!
 
Another great thing to note- these cookie did not spread when I baked them! So feel free to shape em how you please and they won't get all thin and run into one another all sloppy like.

Happy Baking!


Ingredients:
2 1/2 cups all-purpose flour
(or gluten-free flour mix that has xantham gum in it)
1 teaspoon baking powder
1 teaspoon baking soda
2 teaspoons ground cinnamon
1 teaspoon pumpkin pie spice
1/2 teaspoon salt
1/2 cup butter, softened
3/4 cup white sugar
3/4 cup brown sugar

Directions:
1. Preheat oven to 350 degrees F (175 degrees C). Combine flour, baking powder, baking soda, cinnamon, spice, and salt; set aside.
2. In a medium bowl, cream together the 1/2 cup of butter and white sugar. Add pumpkin, egg, and 1 teaspoon vanilla to butter mixture, and beat until creamy. Mix in dry ingredients. Drop on cookie sheet by tablespoonfuls; flatten slightly.
3. Bake for 15 to 20 minutes in the preheated oven. Cool cookies, then drizzle glaze with fork.

1 cup canned pumpkin puree
1 egg
1 teaspoon vanilla extract
3/4 cup of cinnamon chips or chocolate chips (your choice or mix-it-up!)

Thursday, October 28, 2010

How to: Make your own Bunsen and Beaker


Thanks to everyone for their great comments on our costumes this year! It's definitely been a great Halloween season thus far and I can't wait to make another homemade costume for next year.

In the meantime, in case you're wondering how we put these together - here's a quick DIY rundown in case you want to get in touch with your own inner Muppet before this weekend's festivities.


Beaker:
(Instructions translated from meep meep language)


Supplies:
(Head mask)
- 24" tall piece of foam that is long enough to be circled around your head like a cylinder and meet itself on the other side (found this at Jo-Ann Fabric)
- Needle and thread
- 1 yard of flesh colored fabric
- 1 large styrofoam ball
- 2 smaller styrofoam balls (identical)
- Blash mesh fabric (about 12"x12")
- Orange felt (large enough to cover the large styrofoam ball)
- Glue gun
- Black sharpie
- Scissors
- X-acto knife
- Orange tissue paper (found at Party City)


(Body)
- Tie
- Dress shirt
- Slacks
- Furry gloves
- Lab Coat (found at Party City)


Instructions:
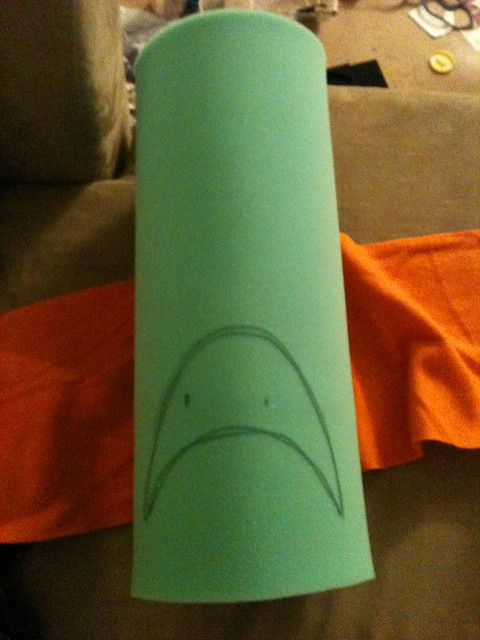
1. Begin to make your head mask by sewing the tall piece of foam into a cylinder. I just did a loose stitch all the way up (so the mask can give and take a little when you slide it on and off but it's still snug.)
2. Once your foam is sewed into a cylinder, slide the mask on, stitched side facing the back/center of your head and have a friend help you mark the eye holes on the mask with a sharpie.
3. Slide the mask off and draw the beaker mouth shape around the eye holes (ensuring you'll be able to see through the mask!)
4. Carefully, slice the shape out of the foam using an x-acto knife (the foam should cut cleanly and quickly).
5. Using a glue gun, cover the cylinder in the flesh fabric. It helps to have a friend hold the fabric taught and to roll it the mask over the fabric to secure it. Tuck the extra fabric at the top into the cylinder and secure with hot glue.
6. Carefully, cut the fabric away that covers the mouth hole. Carefully hot glue the fabric beneath the mask to it makes a clean seam around the mouth.
7. Cut the black mesh to fit behind the mouth and secure it with hot glue. If you can't see through it yet, don't worry - you can slice holes in it to see better and no one will be able to tell.
8. For the nose, cover the large styrofoam with orange fleece (using hot glue). When it's covered, secure it with hot glue above Beaker's mouth area.
9. For the eyes, use a sharpie to add the eyeballs to the smaller styrofoam balls. Secure the eyes with hot glue directly above his nose.
10. For the hair, cut a zig zag pattern into layers of tissue paper and affix using hot glue at various lengths.
11. Complete your outfit with the body materials and you're ready to meep meep meep!


Bunsen Honeydew:


Supplies:
(Head mask)
- One bouncy ball (Target)
- Sponge brush
- Regular brush
- Modge podge with a little bit of water mixed in
- Citron green paint (Michael's)
- Stiffened black felt (two pieces)
- Scissors
- X-acto knife
- White paper torn into small pieces (at least 30 pages)
- Black mesh fabric (12" x 12" or less)
- Playdoh ($1 at 99-cent store)
- 1 large bowl covered with plastic wrap
- 1 shallow dish covered with plastic wrap


(Body)
- Tie
- Dress shirt
- Black vest
- Lab coat (Party City)
- Green gloves (Target for $1)


Directions:
1. Begin by setting the bouncy ball on a bowl covered in plastic wrap. The plastic wrap will hold the ball in place for you.
2. Mix modge podge with a bit of water in the shallow dish covered in plastic wrap. Dip pieces of torn white paper (both sides) into the modge podge, slide it against the side of the dish to drain excess, and place on ball. Cover the entire ball with pieces and make sure to get at least two layers of paper on it. Let dry.
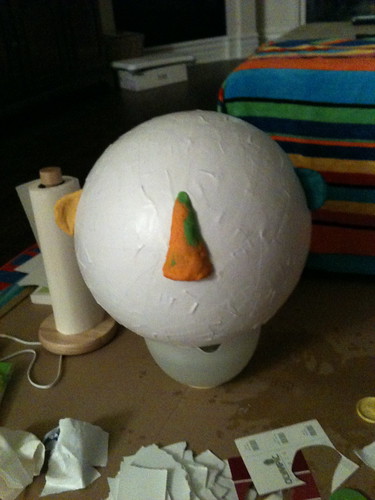
3. Once dry, use play dough to shape Bunsen's nose and ears. Cover all the new pieces with modge podge and allow to dry.
4. When dry, paint the entire mask with green paint. Let dry.
5. Cut glasses frames and glasses sides from the black stiffened felt. (It helps to fold the felt in half to cut even frames, then stick it under something heavy to make it lay flat again). Attach to mask using a hot glue gun.
6. Slice into the ball and let all the air out
7. Draw the shape of Bunsen's mouth then, using an x-acto knife, carefully cut through the paper mache and make sure not to cave in the mask itself.
8. Similar to the Beaker mask, attach black mesh to the inside of the mouth with a hot glue gun.
9. Pair with your body materials and you're ready for the lab!


Happy costume making all!


You can do this!

Tuesday, October 26, 2010

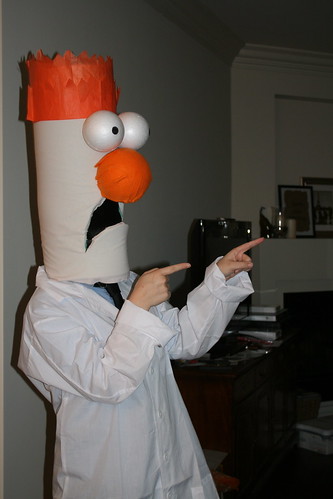
Meep meep meep... meep! The Reveal

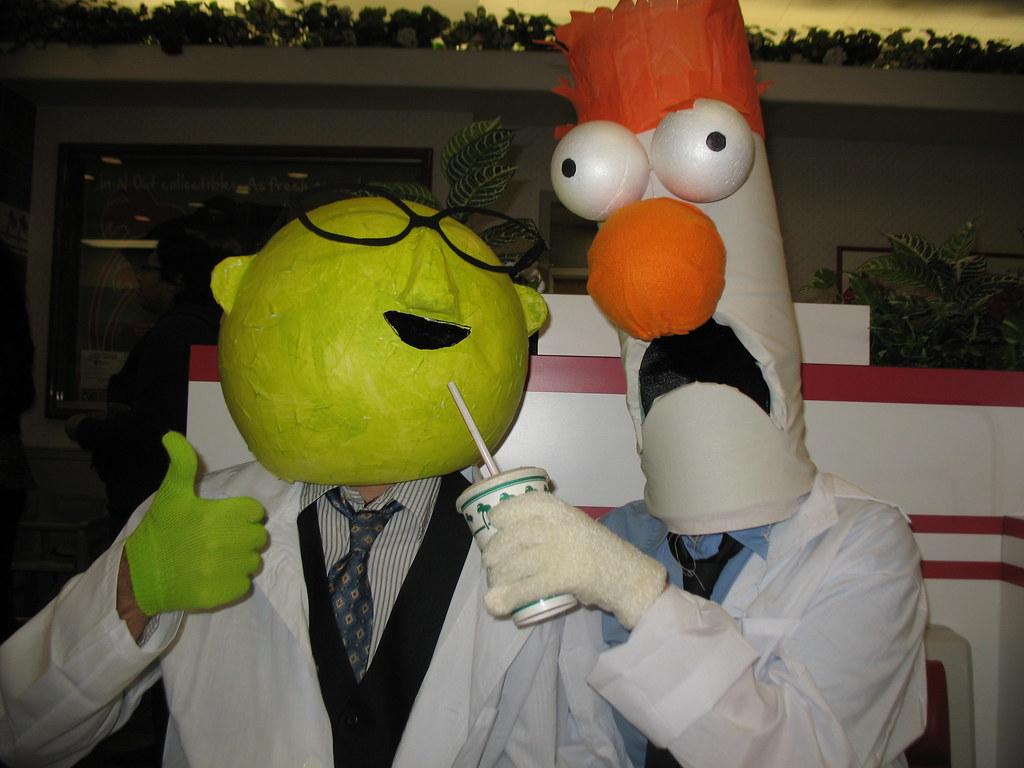
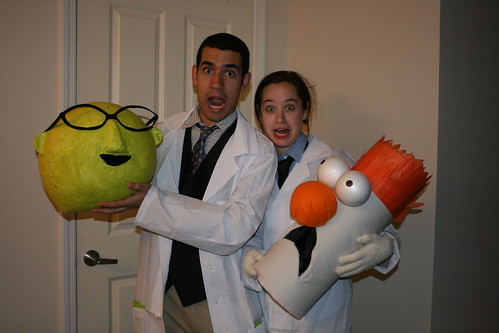
Dun dun dun... introducing - straight from Muppet Labs - 
Bunsen Honeydew and his loyal assistant Beaker!


As you know, I'm a giant Muppet nut and I actually got this idea for a couples costume shortly after last Halloween. It's completely hand-made (aside from the lab coats - thanks Party City). I had a very understanding roommate and very supportive boyfriend to help this costume come to reality. 

See? He's so understanding.
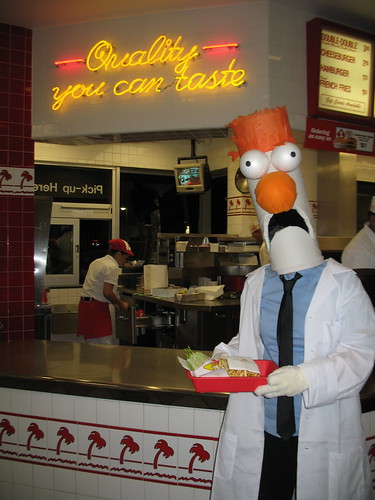
We went to our first Halloween party this past weekend and followed it up by going to a California institution - In N Out! Needless to saying, going as Beaker to In N Out is definitely one of the most fun experience I've ever had out here - definitely the most fun I've ever had in a fast food joint. 


I'll post a DIY post later this week on how you too can get in touch with your inner Muppet by making these costumes with simple stuff - foam, paper mache, paint, etc. Stay tuned and til then - happy costume prepping to you and early Happy Halloween!


Linking up to the DIY Show Off!
Click here to check out the Halloween Link Party

Monday, October 25, 2010

Halloween Costume reveal.. tomorrow!!

Gus and I have already had numerous adventures in this year's COUPLES Halloween costumes! For that reason, I'll do the big reveal TOMORROW! Stop by to see Halloween 2010 awesomeness.

For now, here's another sneaky preview pic!

Sunday, October 24, 2010

A Halloween Cardboard Cemetery

I hardly ever stop my car to take a second look at something I've driven past. Last week, I simply had to after driving through a local neighborhood and spotting a home with some terrific Halloween DIY-ingenuity.


Here's a simple project that most anyone can afford - cardboard, black and grey paint, and scissors/box cutters - which can yield surprisingly witty and awesome results. The instructions are pretty self explanatory ;-)


The Creative Cardboard Cemetery
bury your favorite fictional (or non-ficitonal) characters on your lawn in time for Halloween


Wednesday, October 20, 2010

Halloween Costume 2010 - Sneak Peek

This year, I'm tempted to do more than one sneak peek of my homemade halloween costume(s). Here's a quick look at the early stages of this year's beauty. Stay tuned to the blog for more hints...


Here's last year's costume if you want to see:


Monday, October 18, 2010

Hello apple pie, Goodbye gluten


As you have probably noted by now, I'm trying to do a lot of gluten-free cooking and baking as my sweetheart has developed an allergy to gluten (i.e. wheat) so all delicious things made with wheat flour are off the table. I'm starting to get relatively good at making meals but the big challenge with gluten-free cooking is getting things to taste "chewy." Gluten basically provides that in things like bread, cake, muffins, and it's pretty hard to replicate if you haven't practiced and aren't using the right ingredients.


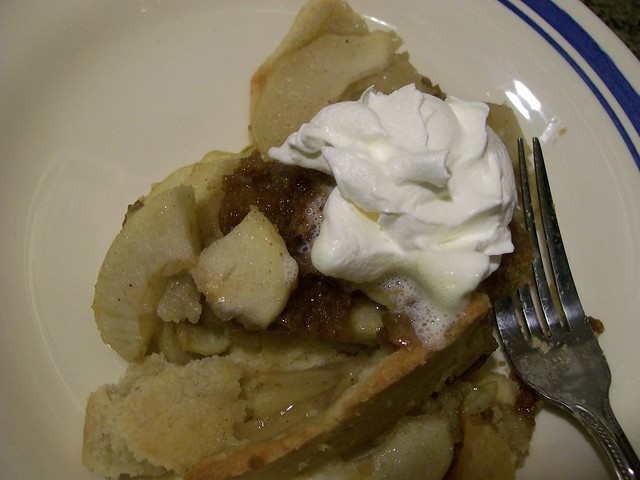
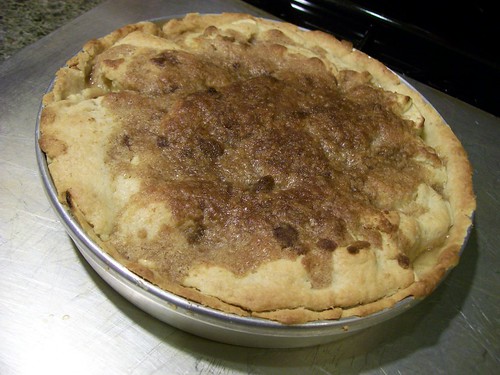
Gus and I recently got a major yen for apple pie and I decided I was up for the challenge. So we googled, and huzzah, made a delicious gluten-free Apple Pie with a crust that tasted like a sugar cookie!


I urge you to make this, even if you and wheat are BFF. You'll love it.


Awesome Gluten-free Apple Pie with Crumb Topping
adapted from food.com

Ingredients

Pastry Crust Makes Two Crusts

    • 1 1/2 cups gluten-free flour ( Bob's Red Mills All Purpose Gluten Free Flour, Avail at Kroger & online)
    • 1/3 cup cornstarch
    • 1/2 cup sugar
    • 1 teaspoon xanthan gum ( Bob's Red Mills)
    • 8 tablespoons butter, cut into pieces
    • 1 large eggs
    • 1 tablespoon gluten-free vanilla extract ( Available online at the Gluten Free Pantry)

    Apple Filling

    • 4 medium apples, peeled, cored and very thinly sliced. Use mildly sweet to tart very crisp apple ( such as Granny Smith, Braeburn, Cortlands)
    • 1/2 cup sugar
    • 1 teaspoon ground cinnamon
    • 1/4 teaspoon ground pumpkin pie spice (or nutmeg)
    • 1/4 teaspoon salt

    Crumble Topping

    • 3/4 cup light brown sugar
    • 3/4 cup gluten-free flour ( See above)
    • 1/2 teaspoon ground cinnamon (or nutmeg or pumpkin pie spice)

Directions 

***Pastry Crust Instructions***.


  1. In a mixing bowl stir together the flour, xanthan gum and cornstarch.
  2. Then add the sugar, butter, egg and vanilla and mix until combined.
  3. Remove dough from bowl and knead and fold on a surface dusted with GF flour until well well combined.
  4. Divide into two pieces and wrap in plastic wrap, place one in the refrigerator to chill and place the other in the freezer for later use.
  5. --Go ahead and make Apple Filling while the Pastry Crust is chilling.
  6. After approx 20 minutes, remove dough from refrigerator and roll into a ball.
  7. Using a rolling pin, roll the dough out on a lightly GF floured surface until it is the thickness of a normal pie crust.
  8. Place crust in a 9 inch glass pie dish that is lightly sprayed with non stick spray.
  9. Using a fork poke a bunch of holes in the sides and bottom of the crust.
***Apple Filling Instructions***.
  1. In a large bowl mix apples, sugar, cinnamon, pumpkin pie spice and salt.
  2. Set aside and let the juices mix.
***Crumble Topping Instructions***.
  1. In small bowl mix together brown sugar, GF flour and cinnamon.
  2. Next mix in the chilled butter and cut it in with a fork or other tool until you have a course crumbly mixture.
***Assembling your Pie***.
  1. Preheat oven to 400°F.
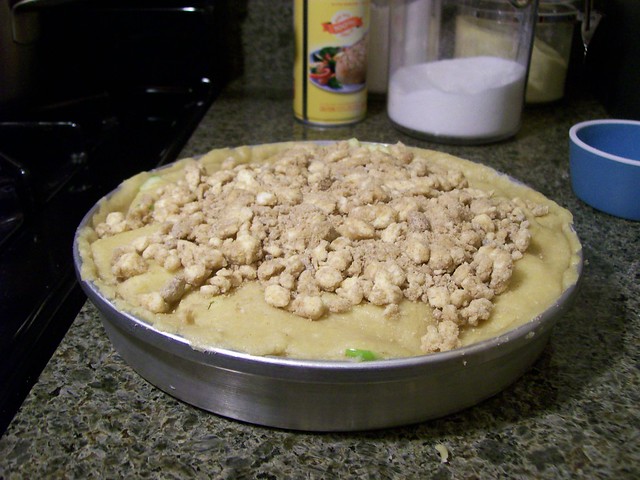
  2. Spoon apples into your pie crust, mounding in the middle and pouring the sugary juices over top.
  3. Sprinkle your Crumble Topping all over the top (use it all).
  4. Use tin foil to cover edges of crust as it will burn easily.
  5. Bake for approximately 35 minutes, topping will be lightly browned and filling will be bubbly.
  6. Let cool for at least an hour before serving. 

Wednesday, October 13, 2010

Spotted: A Nursery with Style


I was giving a friend advice recently about where to find great baby info on the web and realize that I oddly knew of a ton of sites to send her in the direction of - ohdeedoh.com, younghouselove.com, etc. Where did I, 25 year-old with no babies aside from her Pook-a-Looz of Kermit and Fozzie, become a semi-expert on some things? Strange the things that blogging will teach you.


Today, I'm happy to show off a great nursery makeover on the blog. These photos are from my friend Erin's nursery. We met in my old position for Disney Feature Animation. Without further adieu, her nursery for her gorgeous baby Alice is below. Hope you enjoy- I was totally inspired!!


For more info on Erin's incredible giraffe-inspired transformation, head over to her blog - Growing up Senge.

love the simplicity of the name art. totally gorgeous.


Friday, October 8, 2010

Extreme Makeover: Your Home Edition


Say it with me everyone - Move.. that.. BUS!


Okay, sorry, no bus here to move but did recently discover that along with all the amazing good the show, Extreme Home Makeover does on a regular basis, they're also doing the humble DIY'er good too! Apparently they have a huge gallery of DIY projects from their episodes for you to make in your own home.


While some may not tickle your fancy and others don't have extremely detailed instructions, the inspiration alone is worth pointing this online gem out to you guys.


Here's the main link and below are a few of my favorite potential projects.


(source)
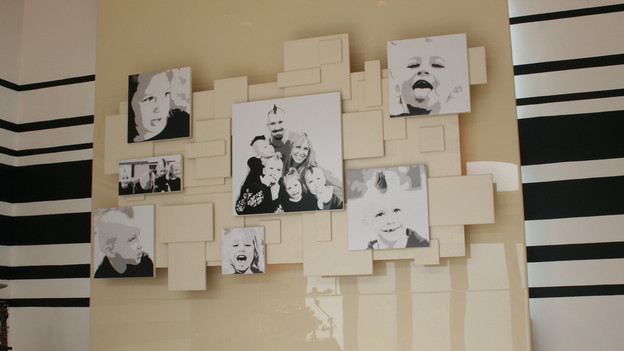
Family Collage Wall with Structure

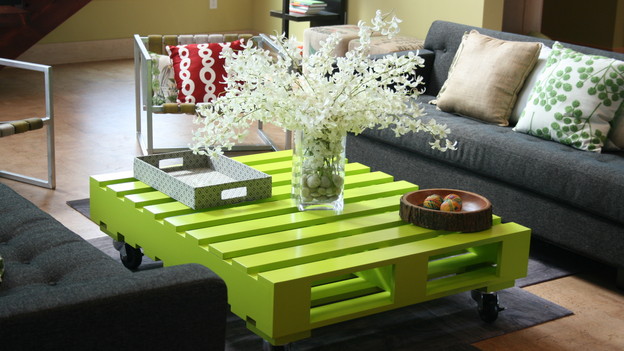
Pallet coffee table with pizazz

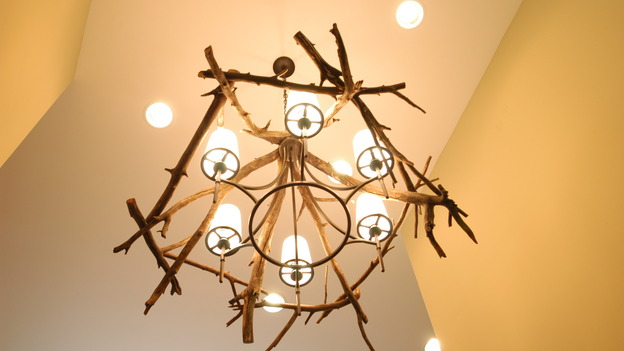
Possibly came from Pottery Barn but it didn't cause YOU made it Branch Chandelier

Monday, October 4, 2010

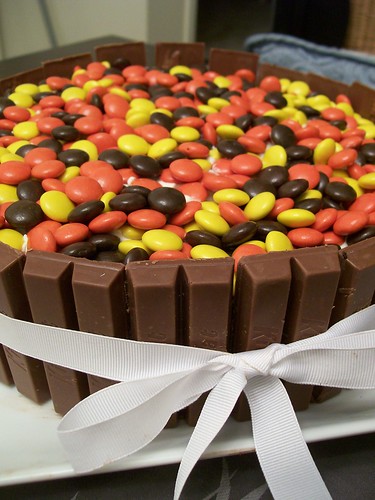
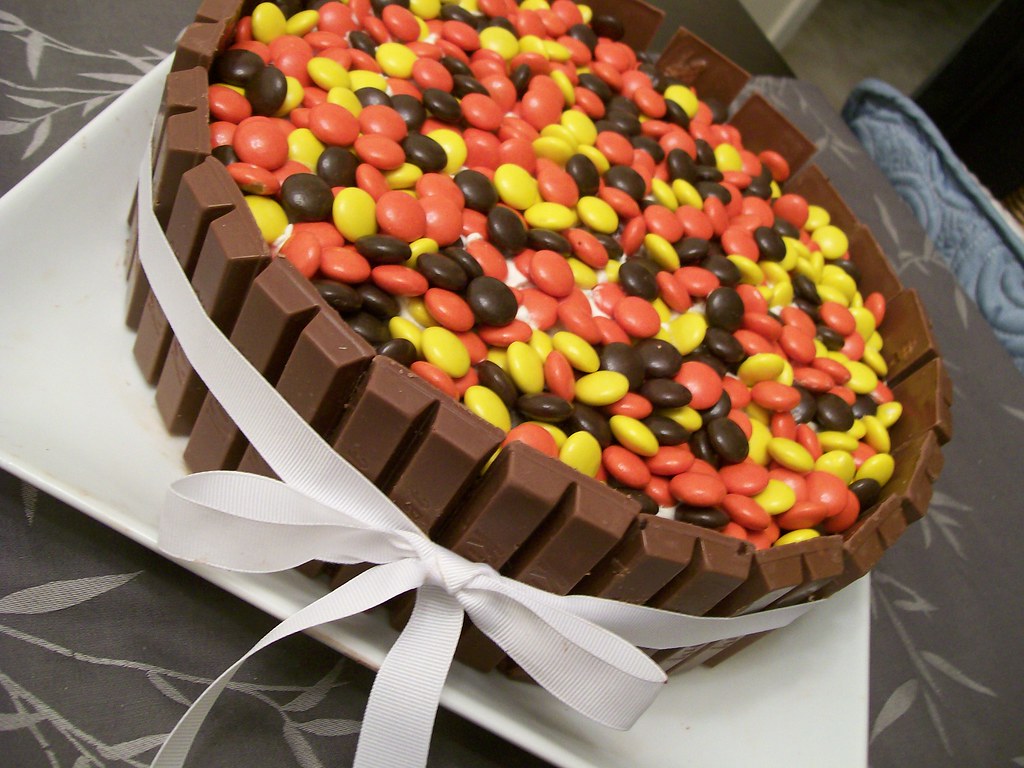
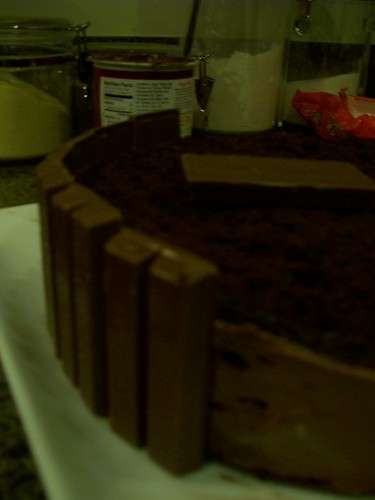
Break me off a piece of that Kit Kat Cake


Yes- this post is exactly what you think it is, you lovers of all things chocolate and wafer. My boss is a big fan of the red wrapped treat - KitKat. So much so, that I've stashed away his favorite treat, frozen as he prefers, and he often asks me to grab one for him when the day's just getting too stressful.


His birthday is in about 10 days but he'll be away on a business trip then a vacation. Last Friday was our last opportunity to catch him for the big day and I figured what would be better to celebrate his love and celebrate my one year of blogging with a most delicious KIT KAT CAKE!


With that my friends, here's how to make your own slice(s) of heaven. This cake was inspired by others I found on the web but hey, I love a great baking opportunity and wanted to pass it along to you.


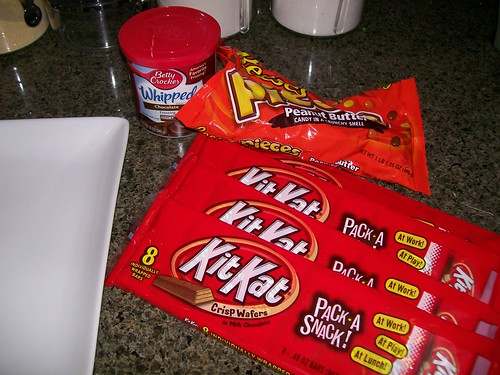
Ingredients and Supplies:
- 1 pkg Triple Fudge Chocolate Cake Mix (any chocolate cake mix works, even Gluten-Free)

- 1 8oz tub Real Creamy Cool Whip
- 1/4 can of chocolate frosting
- 1 large package of Reese's pieces or your favorite chocolate round candies (M&M's, etc.)
- Approximately 24 KitKats (regular size)
- 1 long white ribbon - at least 24"
- 2 9" round cake pans
- Pam 
- Large plate
- Serrated knife


Directions:
1) Prepare to make and bake cake mix as directed. Divide batter into two Pam-greased 9" in round cake pans.
2) Bake cakes as directed on your cake mix packaging.
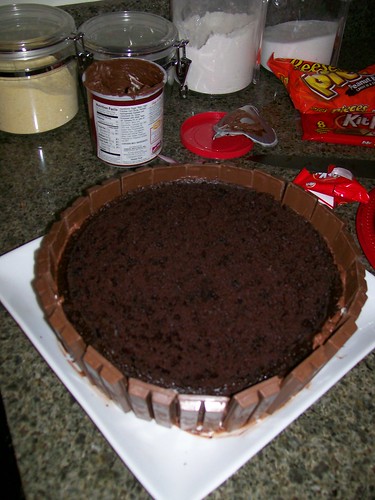
3) After the cakes have cooled, slide one layer onto a large plate. Use a serrated knife to even out the top of the cake if it rose while baking.
4) Top that first layer with approximately 1/3 a tub of cool whip.
5) Slide the second cake layer centered on top of the cool whip and first cake layer - forming a delicious cake sandwich. Yum!
6) Use the serrated knife again to level off this top layer- this will be your base for the 'barrel' insides where your candy lays. You'll want the cake layers to come up no higher than 2/3 the height of your kit kats. Feel free to open one to use it as a measure.
7) Once your cake sandwich is level, top the second layer with a thin spread of cool whip. This will act as your glue, making sure that the candies stay somewhat on top of your cake when you slice into it. 
8) Now, for the Kit Kat border! To "glue" your border to the edges of your cake, use a thin layer of chocolate frosting. Then have a friend (in this case, my sweetheart) help you unwrap 24 kit kats!


9) Attach the kit kats with the kit kat logo facing outward around the cake, using the frosting to help it stick to it. 


10) Take your white ribbon (or whatever color ribbon you like) and run it around the middle of your cake - tying a secure but pretty bow at the front.
11) Last but not least, pour your bag of Reese's pieces or candies on top of the cake - spreading them out evenly, and filling your brand-new Kit Kat cake bucket :)


I was blown away by one - how easy this cake was and two- what a big hit it was! We were worried about surprising my boss since his last day in the office had been incredibly stressful. The day was dwindling down to a close when amazingness happened and he turned to me and said simply, 'Annie - Kit Kat.'


This was the moment! I raced to the fridge and rounded up the office and presented him with 24 kit kats + a cake. Suffice it to say, it was momentous.


And that's kinda how I feel returning to blogging. I've been stressed, distracted, pulled away by other interests and lots of new changes - but at the end of the day - well, end of this year- I've realized it's time for a kit kat. Time to cut lose. Time to get creative again. Glad to be back and thanks for all your support thus far - happy one year blogging anniversary to me!

Friday, October 1, 2010

In anticipation of my anniversary

sup?

Tuesday, October 5 will be my one-year blogging anniversary!

What better way to celebrate by getting back in the swing of writing regular posts? I've been up to so, so many things including a brand new apartment to decorate and lots of other exciting things to update you on.

Here are some things to look forward in the coming months -

New recipes
New DIY projects
New Roommate (!) who's living with Annie
This year's Halloween Costume
& more!
I'm pumped. I hope you are!

Friday, July 2, 2010

Hi there


Gus and I doing field research for work while at Disneyland. Not officially working, but I look to think analyzing the parks as I ride all the rides could potentially help my job.

Hi everyone,

Thanks for your patience as I've stepped away from blogging for a few months to focus on my new job. As some of you know, I had been laid off, spent weeks looking, only to land in an even better, more exciting role with the same company (Disney).

I have a few things in the can to share on the blog soon and will try to post something this holiday weekend or directly after. In the future, I doubt I'll be able to return to my 5-post a week schedule but I'm going to make more regular appearances here.

Thanks for staying tuned- have a wonderful fourth of July everyone!

Annie

Thursday, April 29, 2010

Friday Reveal: Living Room Loveliness

Ooooo.. the reveal appears a few hours early! A prize to anyone compulsively checking my blog for the reveal update. :)

I've been hard at work on my living room lately and after months and months of frames sitting in my closet, I finally broke out the hammer and nails!

Here's the state of my lovely living room these days, complete with new Calvin Klein table runner ( a steal at $5 from Macy's) and artwork (above the desk) for $20 from Marshall's. Other than that, all other additions were stuff around the house, repurposed or hung up for the first time - hurrah!


A short reminder of a few months ago:


and the uber awesome now...


Interested in the evolution of the living room?

Here's a few posts of what led to this point.

Have a great weekend :)

Monday, April 26, 2010

Friday Sneak Peek

I was a busy decorating bee this weekend. Here's a small sneak peek of what I've been up to in the living room. This is a table runner from Calvin Klein - originally $60 (are you kidding me?) - got it at Macy's for $5! Can't beat that.

Stay tuned for a Friday reveal of serenity/my newly lovely living room.


Related Posts with Thumbnails