Recent Posts

Showing posts with label DIY. Show all posts

Thursday, October 28, 2010

How to: Make your own Bunsen and Beaker


Thanks to everyone for their great comments on our costumes this year! It's definitely been a great Halloween season thus far and I can't wait to make another homemade costume for next year.

In the meantime, in case you're wondering how we put these together - here's a quick DIY rundown in case you want to get in touch with your own inner Muppet before this weekend's festivities.


Beaker:
(Instructions translated from meep meep language)


Supplies:
(Head mask)
- 24" tall piece of foam that is long enough to be circled around your head like a cylinder and meet itself on the other side (found this at Jo-Ann Fabric)
- Needle and thread
- 1 yard of flesh colored fabric
- 1 large styrofoam ball
- 2 smaller styrofoam balls (identical)
- Blash mesh fabric (about 12"x12")
- Orange felt (large enough to cover the large styrofoam ball)
- Glue gun
- Black sharpie
- Scissors
- X-acto knife
- Orange tissue paper (found at Party City)


(Body)
- Tie
- Dress shirt
- Slacks
- Furry gloves
- Lab Coat (found at Party City)


Instructions:
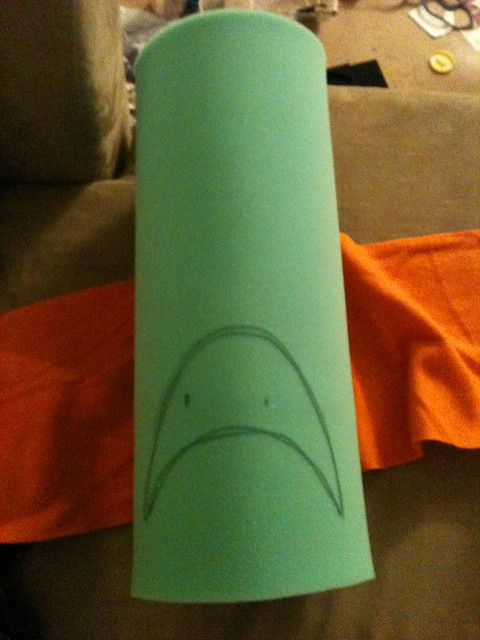
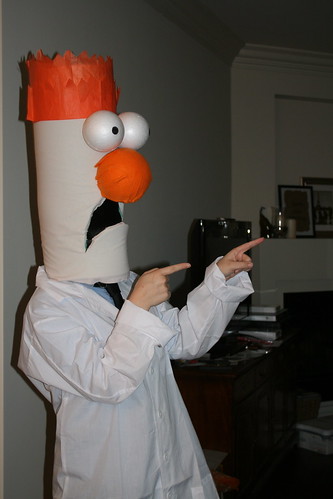
1. Begin to make your head mask by sewing the tall piece of foam into a cylinder. I just did a loose stitch all the way up (so the mask can give and take a little when you slide it on and off but it's still snug.)
2. Once your foam is sewed into a cylinder, slide the mask on, stitched side facing the back/center of your head and have a friend help you mark the eye holes on the mask with a sharpie.
3. Slide the mask off and draw the beaker mouth shape around the eye holes (ensuring you'll be able to see through the mask!)
4. Carefully, slice the shape out of the foam using an x-acto knife (the foam should cut cleanly and quickly).
5. Using a glue gun, cover the cylinder in the flesh fabric. It helps to have a friend hold the fabric taught and to roll it the mask over the fabric to secure it. Tuck the extra fabric at the top into the cylinder and secure with hot glue.
6. Carefully, cut the fabric away that covers the mouth hole. Carefully hot glue the fabric beneath the mask to it makes a clean seam around the mouth.
7. Cut the black mesh to fit behind the mouth and secure it with hot glue. If you can't see through it yet, don't worry - you can slice holes in it to see better and no one will be able to tell.
8. For the nose, cover the large styrofoam with orange fleece (using hot glue). When it's covered, secure it with hot glue above Beaker's mouth area.
9. For the eyes, use a sharpie to add the eyeballs to the smaller styrofoam balls. Secure the eyes with hot glue directly above his nose.
10. For the hair, cut a zig zag pattern into layers of tissue paper and affix using hot glue at various lengths.
11. Complete your outfit with the body materials and you're ready to meep meep meep!


Bunsen Honeydew:


Supplies:
(Head mask)
- One bouncy ball (Target)
- Sponge brush
- Regular brush
- Modge podge with a little bit of water mixed in
- Citron green paint (Michael's)
- Stiffened black felt (two pieces)
- Scissors
- X-acto knife
- White paper torn into small pieces (at least 30 pages)
- Black mesh fabric (12" x 12" or less)
- Playdoh ($1 at 99-cent store)
- 1 large bowl covered with plastic wrap
- 1 shallow dish covered with plastic wrap


(Body)
- Tie
- Dress shirt
- Black vest
- Lab coat (Party City)
- Green gloves (Target for $1)
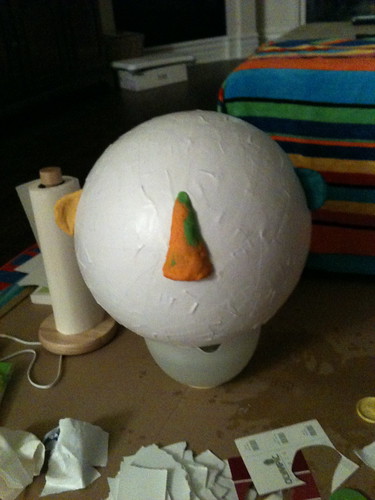


Directions:
1. Begin by setting the bouncy ball on a bowl covered in plastic wrap. The plastic wrap will hold the ball in place for you.
2. Mix modge podge with a bit of water in the shallow dish covered in plastic wrap. Dip pieces of torn white paper (both sides) into the modge podge, slide it against the side of the dish to drain excess, and place on ball. Cover the entire ball with pieces and make sure to get at least two layers of paper on it. Let dry.
3. Once dry, use play dough to shape Bunsen's nose and ears. Cover all the new pieces with modge podge and allow to dry.
4. When dry, paint the entire mask with green paint. Let dry.
5. Cut glasses frames and glasses sides from the black stiffened felt. (It helps to fold the felt in half to cut even frames, then stick it under something heavy to make it lay flat again). Attach to mask using a hot glue gun.
6. Slice into the ball and let all the air out
7. Draw the shape of Bunsen's mouth then, using an x-acto knife, carefully cut through the paper mache and make sure not to cave in the mask itself.
8. Similar to the Beaker mask, attach black mesh to the inside of the mouth with a hot glue gun.
9. Pair with your body materials and you're ready for the lab!


Happy costume making all!

You can do this!

Tuesday, October 26, 2010

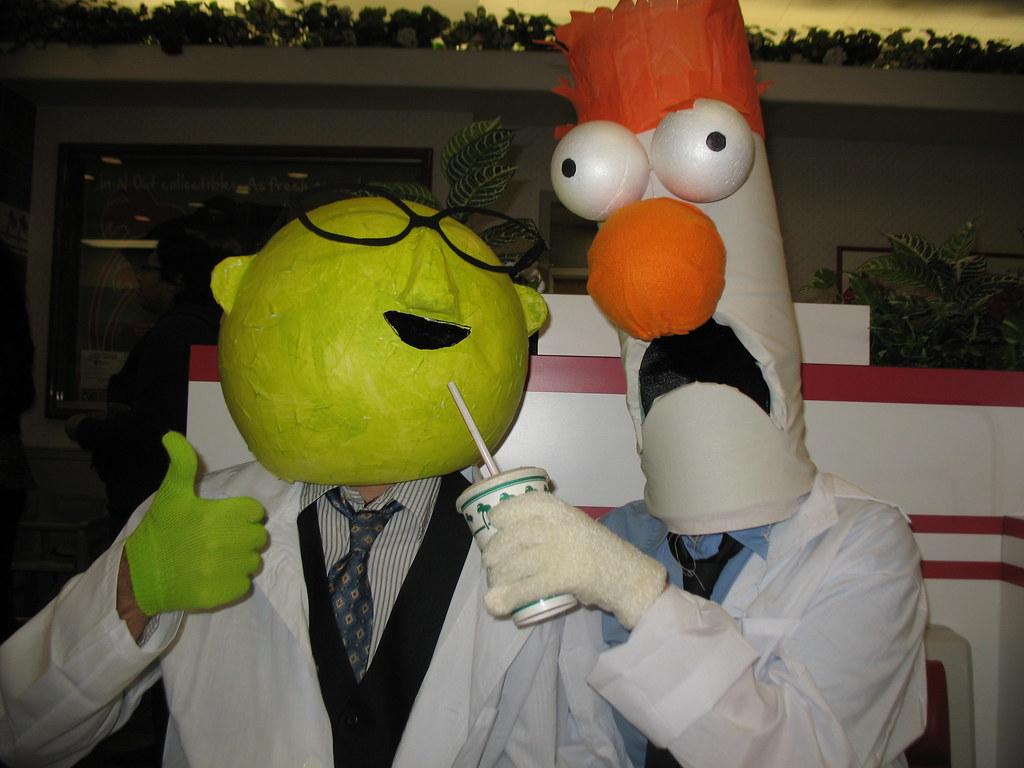
Meep meep meep... meep! The Reveal

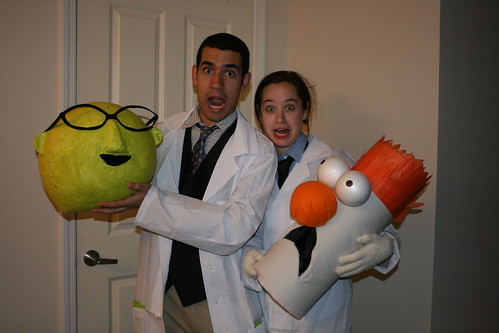
Dun dun dun... introducing - straight from Muppet Labs - 
Bunsen Honeydew and his loyal assistant Beaker!


As you know, I'm a giant Muppet nut and I actually got this idea for a couples costume shortly after last Halloween. It's completely hand-made (aside from the lab coats - thanks Party City). I had a very understanding roommate and very supportive boyfriend to help this costume come to reality. 

See? He's so understanding.
We went to our first Halloween party this past weekend and followed it up by going to a California institution - In N Out! Needless to saying, going as Beaker to In N Out is definitely one of the most fun experience I've ever had out here - definitely the most fun I've ever had in a fast food joint. 


I'll post a DIY post later this week on how you too can get in touch with your inner Muppet by making these costumes with simple stuff - foam, paper mache, paint, etc. Stay tuned and til then - happy costume prepping to you and early Happy Halloween!


Linking up to the DIY Show Off!
Click here to check out the Halloween Link Party

Monday, October 25, 2010

Halloween Costume reveal.. tomorrow!!

Gus and I have already had numerous adventures in this year's COUPLES Halloween costumes! For that reason, I'll do the big reveal TOMORROW! Stop by to see Halloween 2010 awesomeness.

For now, here's another sneaky preview pic!

Sunday, October 24, 2010

A Halloween Cardboard Cemetery

I hardly ever stop my car to take a second look at something I've driven past. Last week, I simply had to after driving through a local neighborhood and spotting a home with some terrific Halloween DIY-ingenuity.


Here's a simple project that most anyone can afford - cardboard, black and grey paint, and scissors/box cutters - which can yield surprisingly witty and awesome results. The instructions are pretty self explanatory ;-)


The Creative Cardboard Cemetery
bury your favorite fictional (or non-ficitonal) characters on your lawn in time for Halloween


Wednesday, October 20, 2010

Halloween Costume 2010 - Sneak Peek

This year, I'm tempted to do more than one sneak peek of my homemade halloween costume(s). Here's a quick look at the early stages of this year's beauty. Stay tuned to the blog for more hints...


Here's last year's costume if you want to see:


Friday, October 8, 2010

Extreme Makeover: Your Home Edition


Say it with me everyone - Move.. that.. BUS!


Okay, sorry, no bus here to move but did recently discover that along with all the amazing good the show, Extreme Home Makeover does on a regular basis, they're also doing the humble DIY'er good too! Apparently they have a huge gallery of DIY projects from their episodes for you to make in your own home.


While some may not tickle your fancy and others don't have extremely detailed instructions, the inspiration alone is worth pointing this online gem out to you guys.


Here's the main link and below are a few of my favorite potential projects.


(source)
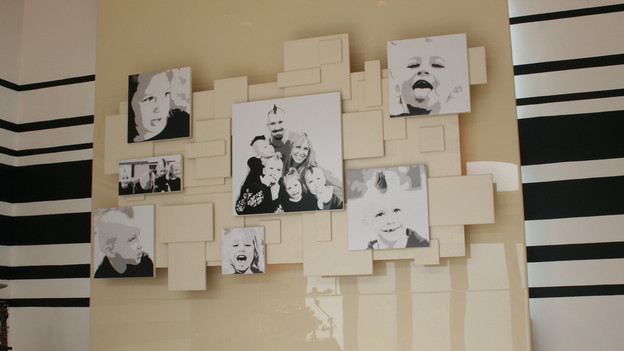
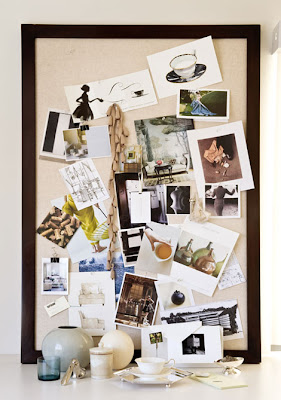
Family Collage Wall with Structure

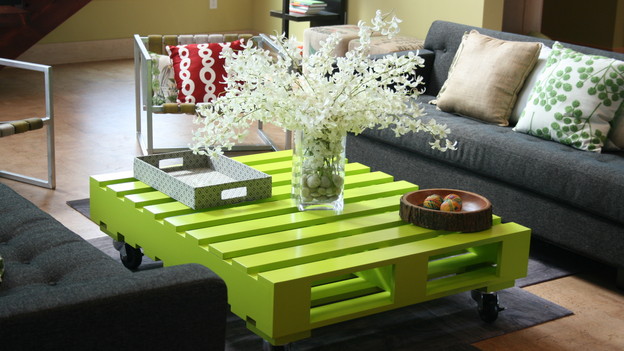
Pallet coffee table with pizazz

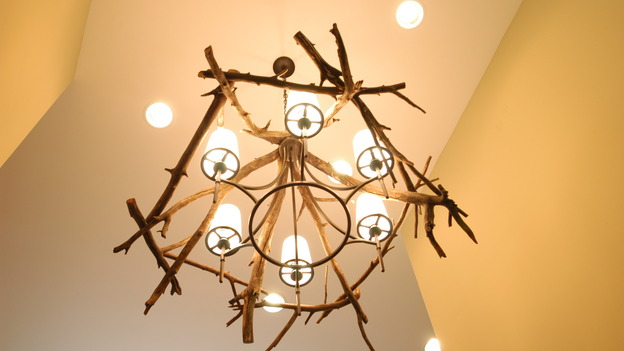
Possibly came from Pottery Barn but it didn't cause YOU made it Branch Chandelier

Thursday, April 29, 2010

Friday Reveal: Living Room Loveliness

Ooooo.. the reveal appears a few hours early! A prize to anyone compulsively checking my blog for the reveal update. :)

I've been hard at work on my living room lately and after months and months of frames sitting in my closet, I finally broke out the hammer and nails!

Here's the state of my lovely living room these days, complete with new Calvin Klein table runner ( a steal at $5 from Macy's) and artwork (above the desk) for $20 from Marshall's. Other than that, all other additions were stuff around the house, repurposed or hung up for the first time - hurrah!


A short reminder of a few months ago:


and the uber awesome now...


Interested in the evolution of the living room?

Here's a few posts of what led to this point.

Have a great weekend :)

Monday, April 26, 2010

Friday Sneak Peek

I was a busy decorating bee this weekend. Here's a small sneak peek of what I've been up to in the living room. This is a table runner from Calvin Klein - originally $60 (are you kidding me?) - got it at Macy's for $5! Can't beat that.

Stay tuned for a Friday reveal of serenity/my newly lovely living room.


Monday, April 12, 2010

Color Scheming


Frustrated by a lack of cohesion with my living room, I've recently turned to a favorite source: Pottery Barn to solve my latest decorating dilemma. I have not been able to decide on any color scheme I truly love! For awhile, it was warm beige, black, white, with pops of red. Snore. I got tired very quickly. I've read that a great place to start for color inspiration is with a rug but I have yet to find a rug I'm truly in love with either (that doesn't cost an arm and a leg). I recently tried to shake things up for Spring in this post but it wasn't quite right.

In pondering this question, I remembered that my bedspread in my bedroom is a print from the 'Barn and I've absolutely loved having it and working with the colors in it. I got to thinking that perhaps I found a print I loved for the living room, I could just use that to guide my color scheme for accessories, pillows, etc.


And that, ladies and jellyspoons, is exactly what I've been up to in the living room. A new color scheme of greys, neutrals, light blues, and small subtle pops of yellow (still adding those). Here's a few befores and the (still in progress) after inspired by Pottery Barn's Sydney Palampore fabric...


BEFORES


AFTER


Wednesday, March 24, 2010

The Best Bouquet - a Gift Card Bouquet


For those of you searching for a new twist on the bouquet of flowers gift... I've got a great DIY for you inspired by a gift I received from my friends Melissa and Harper.


Everyone loves getting flowers but they die a week or two later.. Why not give flowers and some amazing gift cards- the gifts that keep feeding your shopping addiction!


For my 23rd birthday, Harper and Melissa surprised me with a bouquet of lovely flowers and several gift cards (for small amounts) peppered in with those plastic note holders that come with bouquets. Here's how to make your own:


Supplies:
- One nicely sized bouquet of beautiful flowers
- 4-5 gift cards that your loved one would love to have, in amounts that work for you (with or without envelopes, your choice)
- 4-5 plastic note holders for flower arrangements


Directions:
- Place gift cards in envelopes or skip envelope step. Attach each to a plastic note holder and stick into bouquet.

- Present to your delighted loved one! Huzzah!


Happy gift giving everyone:)

Friday, March 19, 2010

Friday Fun with Spray Paint

So I finally got the nerve up to bust out the white spray paint I bought a year ago to transform my old clock/bookcase I got at the thrift store. I didn't anticipate the breeze yesterday and it turned out to be quite the adventure- ending with me inadvertently spraying my black shoes AND my cell phone!

Fortunately, both washed off relatively well and the clock turned out might fine too...


Here's the oddly yellow before -

The super white and lovely after...

Have a great weekend all! :)

Friday, March 5, 2010

The Style Files: Organizing your home inspiration


Recently, I've devised my own little system of logging all the great inspirational home decorating pictures I find on the web. I've made an "Inspiration File" as a Word Document in Microsoft Word. When I find a great staircase or a kitchen I love, I copy the picture and paste it directly in the Word Doc. I'm always careful to save constantly.


Before, I was just throwing photos in a Gmail draft but that wasn't too easy on the eyes or easy to print if I need to. With my inspiration document, I can literally print out a book of all the things that have me thinking creatively about my home.


My way of organizing my favorite home decor across the web is just ONE of the many out there. Take these for example if you're still wondering how best to keep yourself ready to create:


Young House Love

In this post on their site, John and Sherry describe how they keep their thoughts straight by creating an actual physical catalog. They literally rip out pages, slide them in clear page protectors, and throw them in a binder for easy perusing later. Read more for their extra tips here

Craftgawker

This recent addition to the Gawker Family (along with WeddingGawker.com and FoodGawker.com) is a visual search engine of crafts, including art for the home. If you register with them, you can favorite any of the posts to keep them handy. However, this is obviously limited to whatever photos they have and not the entire interweb. Same goes for Etsy which will allow you to favorite items and sellers. I prefer to favorite sellers as items disappear the minute they are sold!

Houzz

I used Houzz to pull together my office space inspiration and I really love it as a design inspiration gatherer. They've got an easy to use interface, great search, and best of all a quick way to add any picture to your own "ideabook." You can make several, divisible however you'd like. This is also a great option for inspiration you can get to from any computer.  

Apartment Therapy

In a reply to a reader who's amassed hundreds of scanned photos and online ones, AT suggests the option of getting a specific small USB drive to store the photos and printing yourself an ideabook once a year through a site like Shutterfly. For more of that post, click here.

AT also recommends these 11 other options for storing online inspiration. Some are traditional (printing out and organizing by hand) and some are very creative such as using Flickr.


No matter how you organize, the trick is to find a system that works for you and gives you an easy way of creating and USING your style file.

Friday, February 26, 2010

Friday Reveal: Bedroom Stencils


My bedroom has sorely been in need of some color or visual interest on the walls. It's also been in desperate need of beautiful matching lamps to sit on those new nightstands.


This past weekend, I solved both with a trip to Pier One (for the Serena Accent Lamps) and a crafty easy DIY project to liven up the space!

Here's the before:


And here's the AFTER:


So how does she do it?
She does it cheaply and quickly, and you can too.

DIY Contact Paper Stencils

Supplies:
- Roll of contact paper, any color (I used white)
- 1/4 quart of paint in your color choice (This is Dutch Boy Durham Beige in Flat finish)
- Foam brush
- Scissors
- Pencil or pen
- X-acto knife
- Drop cloths or other means of covering your floors and other objects


Directions:
Lay out your contact paper and draw your design. I used my bedspread as inspiration and drew larger versions of elements from it to tie the whole room together. As you draw, decide which places you'd like your paint to appear and make sure you've cut those spaces OUT using a scissor x-acto knife. Be careful to keep your designs simple or you won't be able to keep the stencil from sticking to itself once you remove it from the protective backing of the contact paper.

Once you have your design and you've cut out the spaces where you'd like the paint to appear, pull the remnants of the contact paper away from the protective backing (so you've made yourself a giant sticker). Place said giant sticker on the wall and prepare for painting.

Smooth your hand over your stencil as you adhere it to your wall. Do not worry, it will not take paint off your walls (at least it didn't at all with mine). Use a foam brush to paint on top of the stencil and fill in all your spaces.

Immediately pull the contact paper stencil away from the wall and you'll have a gorgeous, crisp design ready to go. If your stencil isn't too wet at this point, you can do what I did and reuse it on another part of the wall. Tip: You can also use the remnants from the original stencil (the stuff you cut out to make a space for the paint) to make an inverse design. I did this and alternated on each wall.

If you are wary of free-handing your own stencils, you could always trace a design onto contact paper using carbon paper.

This whole project took about 2 hours and cost about $5 worth of paint + contact paper. I am incredibly pleased with the results and even more happy because I won't have to paint all that much back when I move out!


Now, all I need is curtains. Stay tuned for the further evolution of Annie's bedroom makeover.

Submitting to today's DIY Showoff! Submit your favorite DIY show-off projects here.

Monday, February 22, 2010

Friday Reveal Sneak Peek

I got wonderfully busy decorating this weekend and will reveal all of the amazingness this FRIDAY. 
For now, here's a sneak peek to get excited/confused about...

What the hey could that be?

Wednesday, February 17, 2010

Reader Paper Portrait

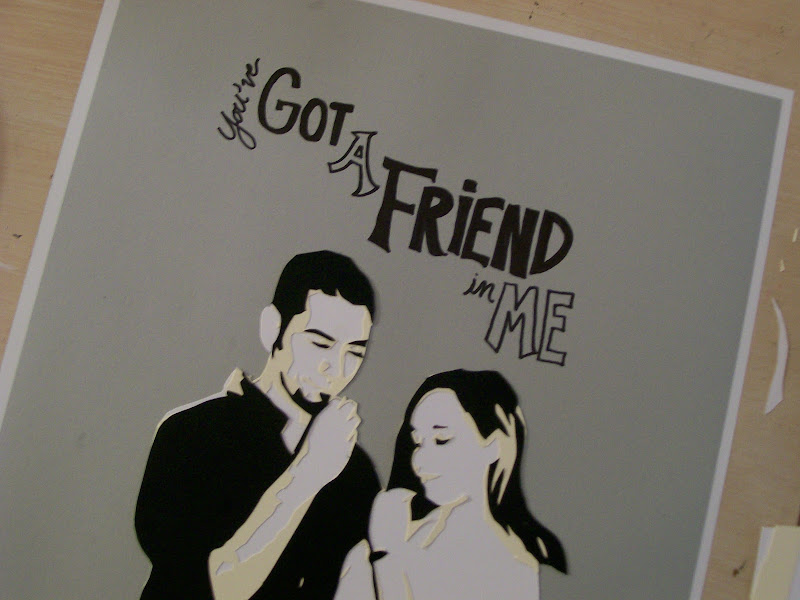
My dear friend Laura made a special valentine's gift for her Valentine this year. It's inspired by LivingwithAnnie and Paul Overton's DudeCraft. Check out the most amazingness below! I love her choice of photo. These portraits tend to work best when you use close-ups!


To check out my paper portrait projects, click here.
Related Posts with Thumbnails