Recent Posts

Showing posts with label Recipes. Show all posts

Tuesday, January 11, 2011

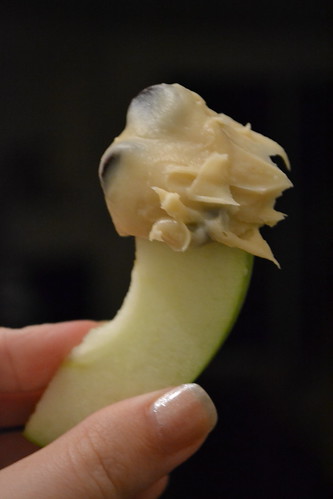
Cookie Dough... Dip


Scientists have done many important things, admittedly, but their latest discovery is one I wish I'd thought of long ago - CHOCOLATE CHIP COOKIE DOUGH DIP! All the great things about cookie dough - the texture, the flavor, the sinfulness - without all the health hazards of cookie dough - i.e. raw eggs and wheat flour (for Gus)!


I stumbled upon this recipe while perusing Tastespotting and made my own modifications. Create, enjoy, improve and mangia people! This is some deliciously awesome stuff.


Ingredients:
- 1 pkg of cream cheese (8 oz)
- 1/4 cup powdered sugar
- 1/4 cup big granule white sugar (if you have it, otherwise increase powdered)
- 1 stick of butter (1/2 cup) 
- 3/4 cup brown sugar
- 3/4 cup of semi-sweet chocolate chips
- Any additional mix-ins you'd like!


Directions:
1. Melt butter on medium-low heat in a skillet. Add brown sugar and stir until butter browns and has a nutty aroma (you're creating brown butter). 
2. Set butter and brown sugar aside to cool. Combine cream cheese and remaining white and powdered sugar.
3. Add butter/brown sugar mixture to the cream cheese mixture. Combine and add chocolate chips/any other mix-ins.
4. Serve with sliced granny smith apples, graham crackers, or even a bagel! Hey, it's basically Cookie dough cream cheese after all! Nom!


Thursday, December 30, 2010

Om Nom Pumpkin Chip Cookies


Hope you all have had a wonderful holiday season! I've got a few treats in store including the news that I now have a blog-worthy DSLR camera to capture all my memorable moments.


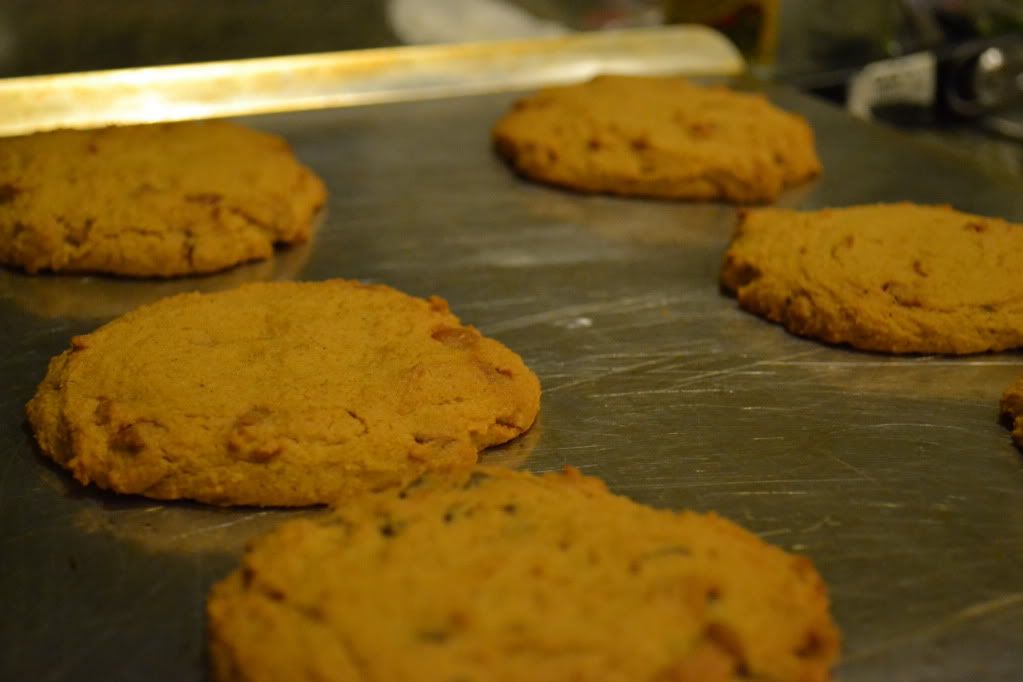
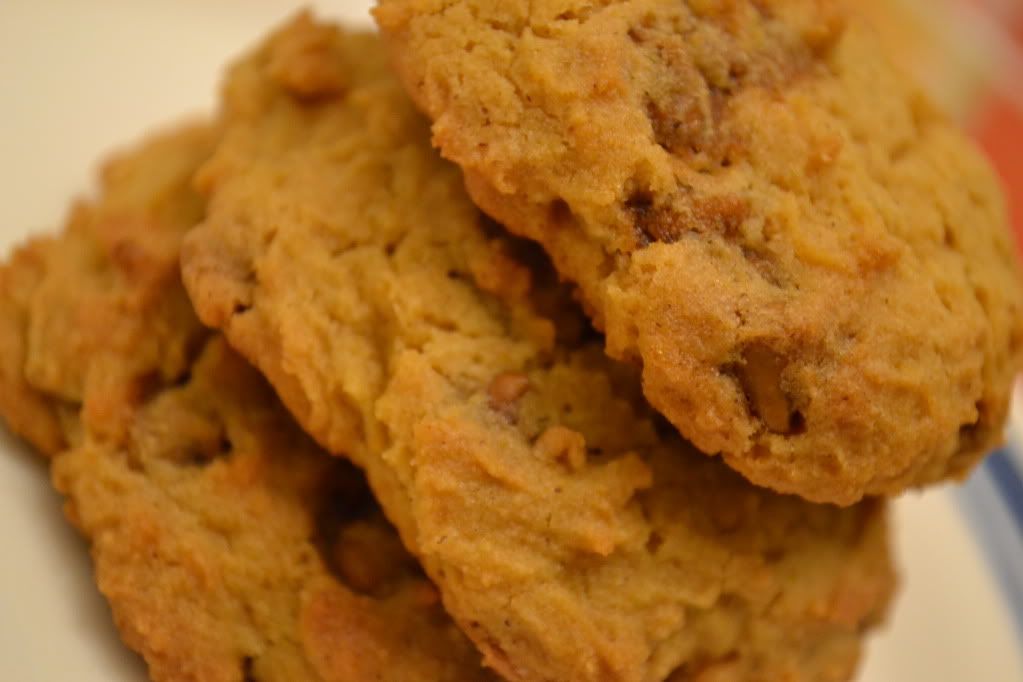
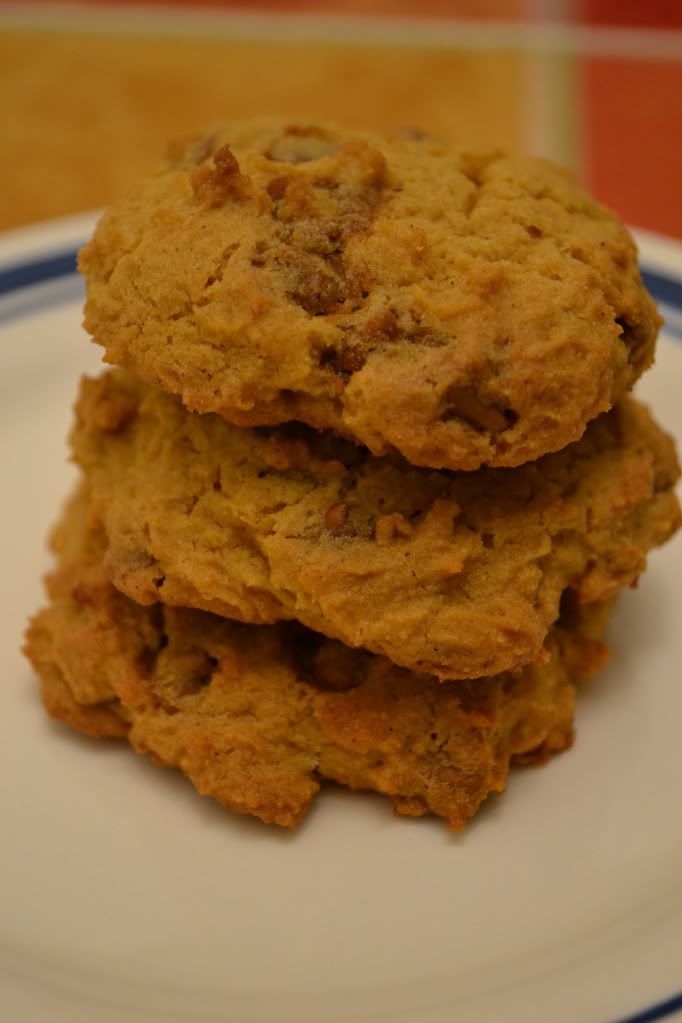
For Christmas Day this year, we managed to make some pretty amazing and somewhat healthy (cough, cough) cookies that were both gluten-free and DELICIOUS. They're very cake-y and moist and stay that way for days on end! The pumpkin flavor isn't too overpowering either. I mixed cinnamon chips in half the batch, chocolate chunks from Ghiradelli in another. Om nom, indeed.

Here's the recipe if you guys want to make these- I've adapted it slightly from this one at All Recipes and it can be made gluten-free or with regular wheat flour. I didn't make the icing glaze- it didn't need it!
 
Another great thing to note- these cookie did not spread when I baked them! So feel free to shape em how you please and they won't get all thin and run into one another all sloppy like.

Happy Baking!


Ingredients:
2 1/2 cups all-purpose flour
(or gluten-free flour mix that has xantham gum in it)
1 teaspoon baking powder
1 teaspoon baking soda
2 teaspoons ground cinnamon
1 teaspoon pumpkin pie spice
1/2 teaspoon salt
1/2 cup butter, softened
3/4 cup white sugar
3/4 cup brown sugar

Directions:
1. Preheat oven to 350 degrees F (175 degrees C). Combine flour, baking powder, baking soda, cinnamon, spice, and salt; set aside.
2. In a medium bowl, cream together the 1/2 cup of butter and white sugar. Add pumpkin, egg, and 1 teaspoon vanilla to butter mixture, and beat until creamy. Mix in dry ingredients. Drop on cookie sheet by tablespoonfuls; flatten slightly.
3. Bake for 15 to 20 minutes in the preheated oven. Cool cookies, then drizzle glaze with fork.

1 cup canned pumpkin puree
1 egg
1 teaspoon vanilla extract
3/4 cup of cinnamon chips or chocolate chips (your choice or mix-it-up!)

Monday, October 18, 2010

Hello apple pie, Goodbye gluten


As you have probably noted by now, I'm trying to do a lot of gluten-free cooking and baking as my sweetheart has developed an allergy to gluten (i.e. wheat) so all delicious things made with wheat flour are off the table. I'm starting to get relatively good at making meals but the big challenge with gluten-free cooking is getting things to taste "chewy." Gluten basically provides that in things like bread, cake, muffins, and it's pretty hard to replicate if you haven't practiced and aren't using the right ingredients.


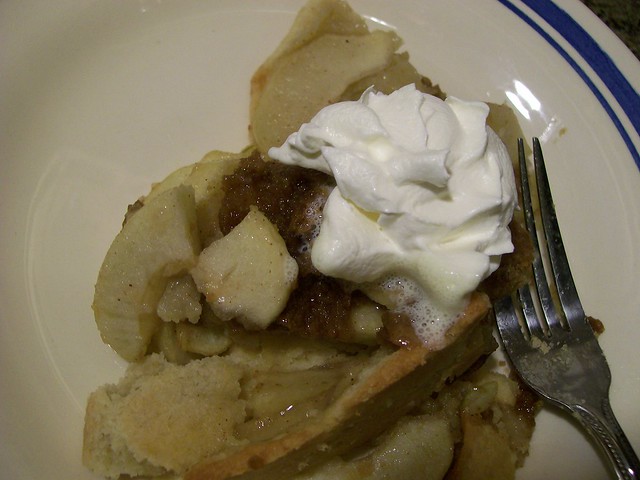
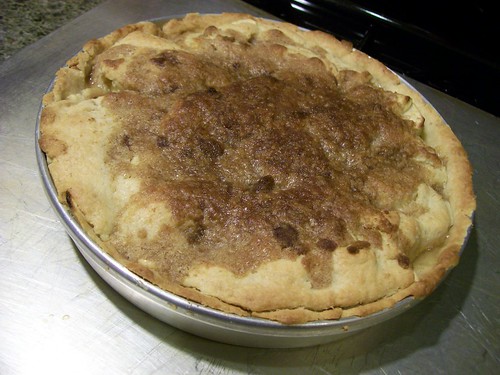
Gus and I recently got a major yen for apple pie and I decided I was up for the challenge. So we googled, and huzzah, made a delicious gluten-free Apple Pie with a crust that tasted like a sugar cookie!


I urge you to make this, even if you and wheat are BFF. You'll love it.


Awesome Gluten-free Apple Pie with Crumb Topping
adapted from food.com

Ingredients

Pastry Crust Makes Two Crusts

    • 1 1/2 cups gluten-free flour ( Bob's Red Mills All Purpose Gluten Free Flour, Avail at Kroger & online)
    • 1/3 cup cornstarch
    • 1/2 cup sugar
    • 1 teaspoon xanthan gum ( Bob's Red Mills)
    • 8 tablespoons butter, cut into pieces
    • 1 large eggs
    • 1 tablespoon gluten-free vanilla extract ( Available online at the Gluten Free Pantry)

    Apple Filling

    • 4 medium apples, peeled, cored and very thinly sliced. Use mildly sweet to tart very crisp apple ( such as Granny Smith, Braeburn, Cortlands)
    • 1/2 cup sugar
    • 1 teaspoon ground cinnamon
    • 1/4 teaspoon ground pumpkin pie spice (or nutmeg)
    • 1/4 teaspoon salt

    Crumble Topping

    • 3/4 cup light brown sugar
    • 3/4 cup gluten-free flour ( See above)
    • 1/2 teaspoon ground cinnamon (or nutmeg or pumpkin pie spice)

Directions 

***Pastry Crust Instructions***.


  1. In a mixing bowl stir together the flour, xanthan gum and cornstarch.
  2. Then add the sugar, butter, egg and vanilla and mix until combined.
  3. Remove dough from bowl and knead and fold on a surface dusted with GF flour until well well combined.
  4. Divide into two pieces and wrap in plastic wrap, place one in the refrigerator to chill and place the other in the freezer for later use.
  5. --Go ahead and make Apple Filling while the Pastry Crust is chilling.
  6. After approx 20 minutes, remove dough from refrigerator and roll into a ball.
  7. Using a rolling pin, roll the dough out on a lightly GF floured surface until it is the thickness of a normal pie crust.
  8. Place crust in a 9 inch glass pie dish that is lightly sprayed with non stick spray.
  9. Using a fork poke a bunch of holes in the sides and bottom of the crust.
***Apple Filling Instructions***.
  1. In a large bowl mix apples, sugar, cinnamon, pumpkin pie spice and salt.
  2. Set aside and let the juices mix.
***Crumble Topping Instructions***.
  1. In small bowl mix together brown sugar, GF flour and cinnamon.
  2. Next mix in the chilled butter and cut it in with a fork or other tool until you have a course crumbly mixture.
***Assembling your Pie***.
  1. Preheat oven to 400°F.
  2. Spoon apples into your pie crust, mounding in the middle and pouring the sugary juices over top.
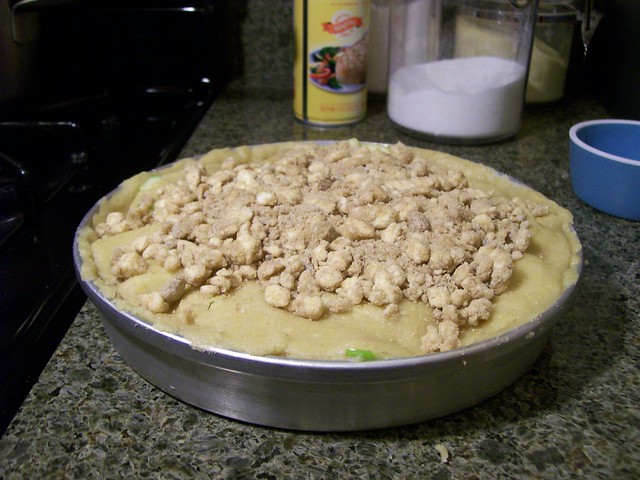
  3. Sprinkle your Crumble Topping all over the top (use it all).
  4. Use tin foil to cover edges of crust as it will burn easily.
  5. Bake for approximately 35 minutes, topping will be lightly browned and filling will be bubbly.
  6. Let cool for at least an hour before serving. 

Monday, October 4, 2010

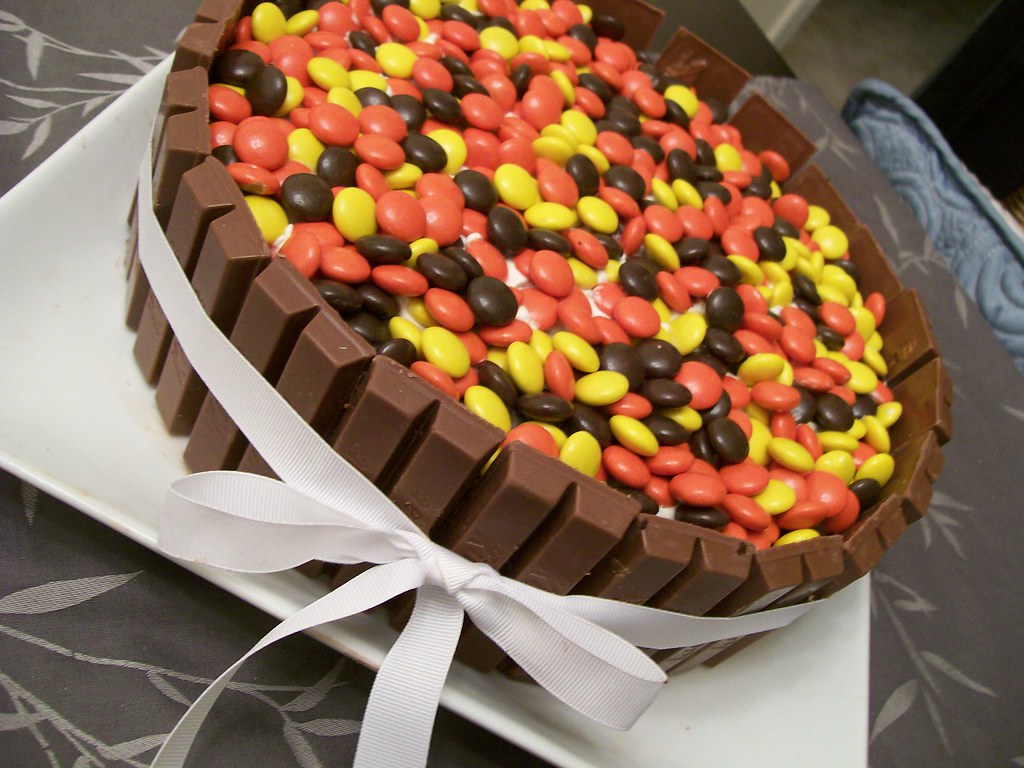
Break me off a piece of that Kit Kat Cake


Yes- this post is exactly what you think it is, you lovers of all things chocolate and wafer. My boss is a big fan of the red wrapped treat - KitKat. So much so, that I've stashed away his favorite treat, frozen as he prefers, and he often asks me to grab one for him when the day's just getting too stressful.


His birthday is in about 10 days but he'll be away on a business trip then a vacation. Last Friday was our last opportunity to catch him for the big day and I figured what would be better to celebrate his love and celebrate my one year of blogging with a most delicious KIT KAT CAKE!


With that my friends, here's how to make your own slice(s) of heaven. This cake was inspired by others I found on the web but hey, I love a great baking opportunity and wanted to pass it along to you.


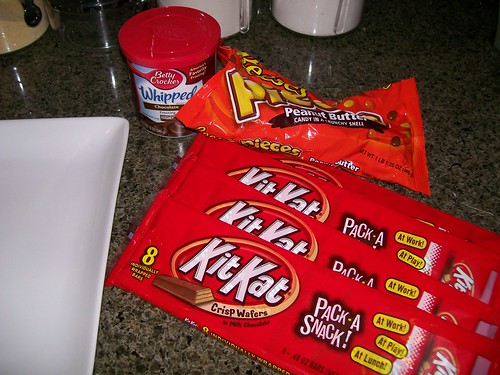
Ingredients and Supplies:
- 1 pkg Triple Fudge Chocolate Cake Mix (any chocolate cake mix works, even Gluten-Free)

- 1 8oz tub Real Creamy Cool Whip
- 1/4 can of chocolate frosting
- 1 large package of Reese's pieces or your favorite chocolate round candies (M&M's, etc.)
- Approximately 24 KitKats (regular size)
- 1 long white ribbon - at least 24"
- 2 9" round cake pans
- Pam 
- Large plate
- Serrated knife


Directions:
1) Prepare to make and bake cake mix as directed. Divide batter into two Pam-greased 9" in round cake pans.
2) Bake cakes as directed on your cake mix packaging.
3) After the cakes have cooled, slide one layer onto a large plate. Use a serrated knife to even out the top of the cake if it rose while baking.
4) Top that first layer with approximately 1/3 a tub of cool whip.
5) Slide the second cake layer centered on top of the cool whip and first cake layer - forming a delicious cake sandwich. Yum!
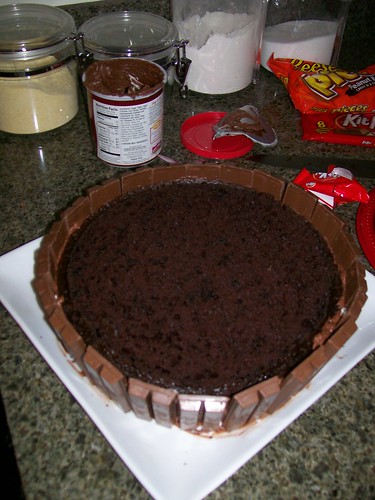
6) Use the serrated knife again to level off this top layer- this will be your base for the 'barrel' insides where your candy lays. You'll want the cake layers to come up no higher than 2/3 the height of your kit kats. Feel free to open one to use it as a measure.
7) Once your cake sandwich is level, top the second layer with a thin spread of cool whip. This will act as your glue, making sure that the candies stay somewhat on top of your cake when you slice into it. 
8) Now, for the Kit Kat border! To "glue" your border to the edges of your cake, use a thin layer of chocolate frosting. Then have a friend (in this case, my sweetheart) help you unwrap 24 kit kats!


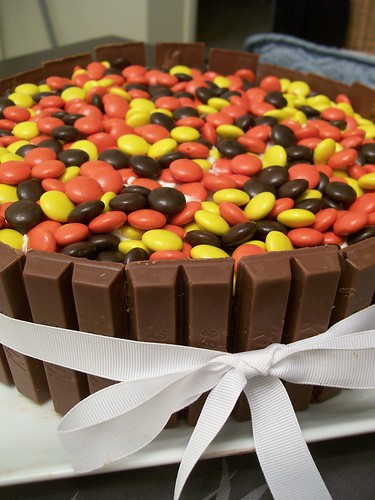
9) Attach the kit kats with the kit kat logo facing outward around the cake, using the frosting to help it stick to it. 


10) Take your white ribbon (or whatever color ribbon you like) and run it around the middle of your cake - tying a secure but pretty bow at the front.
11) Last but not least, pour your bag of Reese's pieces or candies on top of the cake - spreading them out evenly, and filling your brand-new Kit Kat cake bucket :)


I was blown away by one - how easy this cake was and two- what a big hit it was! We were worried about surprising my boss since his last day in the office had been incredibly stressful. The day was dwindling down to a close when amazingness happened and he turned to me and said simply, 'Annie - Kit Kat.'


This was the moment! I raced to the fridge and rounded up the office and presented him with 24 kit kats + a cake. Suffice it to say, it was momentous.


And that's kinda how I feel returning to blogging. I've been stressed, distracted, pulled away by other interests and lots of new changes - but at the end of the day - well, end of this year- I've realized it's time for a kit kat. Time to cut lose. Time to get creative again. Glad to be back and thanks for all your support thus far - happy one year blogging anniversary to me!

Wednesday, April 7, 2010

Mmm Spinach and Artichoke Dip


One of my restaurant faves the past few years has been Spinach & Artichoke Dip. I often get it as a meal instead of an appetizer and it is equally delicious with flatbread, garlic bread, or tortilla chips!


I've been meaning to make my own version for Gus and I to enjoy on the cheap (sans giant restaurant bill). So here it is, deliciously cheesy Spinach and Artichoke Dip for your home table...


Ingredients:
- 3 oz. frozen spinach, thawed and chopped finely (fresh can work too)
- 1 10oz. can of artichoke hearts, drained and chopped finely 
- 3/4 cup reduced fat mayonnaise
- 1/2 cup shredded parmesan 
- 1/2 cup shredded mozzarella
- Dash of salt, pepper, garlic powder, lemon juice, and cayenne pepper

Directions:
- Preheat the oven to 400F. 
- Combine spinach, artichokes, mayo, most of the mozzarella, spices, and half the parmesan cheese until well blended.
- Place dip in greased small glass pan and top with remaining mozzarella and parmesan.
- Bake until cheese turns golden brown and you can see the dip bubbling.
- Serve with chips, croutons, forks.. anything you want! Enjoy!

Author's Note:
Just an FYI to fans who miss my daily posts. I lost my job a few weeks ago and have been interviewing like crazy to find a new one. Since this doesn't leave me much time or resources to blog, I've been writing sporadically.

I hope to be able to post more regularly again soon. Thanks for stopping by as always!


Tuesday, March 30, 2010

Piccata in a Pinch


The other night, Gus and I were hoping to make Chicken Piccata with our trusty Chicken Piccata sauce from Trader Joe's. We were stopped in our tracks when we realized our open bottle of Piccata sauce was wayyyy too old to eat! Solution number two: Trader Joe's Cacciatore Sauce! We had a brand new bottle we'd been meaning to try.


We pop that open and my happy smile falls.... I smell red peppers! Aaaahhh, there's a few things I really don't like, especially in tomato sauce - and red peppers is definitely one of those things!


So here we are, chicken with onions and pasta cooking away.. and no sauce!


Dun dun dun.. the birth of a new recipe: Piccata in a Pinch! Enjoy this when you're in the mood for a lemony, wine, butter sauce full of deliciousness. Chances are most of this stuff is on hand in your pantry already.. it was in mine thankfully!


Serves 2-3


Ingredients:
- 2 large chicken breasts, diced into medium pieces (cooked- We put ours in the crock pot on high for 2 hours when it was originally frozen)
- 1 lb of your choice of pasta, cooked and drained
- 1 small onion, diced
- 1 tablespoon olive oil
- 1 teaspoon garlic gloves
- 2 oz. of cream cheese (reduced fat works great)
- 1/2 cup Zesty Italian Dressing
- 1 tablespoon of lemon juice
- 1 cup of white wine
- 2 large pats of butter
- Dash of basil, parley, salt, and pepper


Directions:
- Cook pasta separately while making the chicken with sauce.
- Saute onion and garlic with olive oil over medium heat.
- After a few minutes, add chicken pieces to the mixutre and continue to cook until the chicken browns just a bit.
- In a small bowl, combine italian dressing, lemon juice, cream cheese, wine, butter, and spices. Add this mixture to the saute pan with the chicken.
- Simmer sauce for at least 5 minutes. It should smell awesomely like butter and wine.
- To finish, top pasta with sauce and enjoy! Yum!

Thursday, March 18, 2010

Easy and Delicious Baked Ziti


Gus has been asking me to make baked ziti for ages - even before he developed a gluten allergy this past summer. Even though now he can't eat gluten, we finally managed to make a delicious baked ziti that's easy, gluten-free, and yummy for everyone!

Here's how to make your own amazingness tonight...


Ingredients:
- 1 lb of gluten-free ziti/penne noodles or regular wheat noodles (if you can eat 'em)
- 3 and 1/2 medium sized mild sausages, grilled then sliced
- 1/2 large white onion, chopped
- 1 zucchini, diced
- 1 26oz jar of spaghetti sauce (we used Classico Tomato and Basil)
- 1 8oz pkg of reduced fat cream cheese, softened
- 1/2 cup of sour cream
- 12 slices of Provolone
- 4 slices of Mozerella
- 1/2 cup of shredded parmesan
- Garlic powder, salt, and pepper to taste


Directions:
- Grill sausages and slice into small discs. Set aside.
- Set water boiling in a large pot for the pasta. Saute onion and zucchini with a dash of salt, pepper, and garlic powder on medium heat until mostly cooked through.
- Add the sliced sausage to the mixture. Stir for a few minutes, then add your spaghetti sauce and turn heat to low.
- Preheat the oven to 350F.
- Mix the sour cream and cream cheese together.
- When water boils, cook the pasta for a little more than half the normal cooking time then drain it. It'll cook the rest of the way in the pan with the sauce.
- Once your pasta is ready - here's how to assemble:
-- Use pam or olive oil to coat a 9 x 13 glass pan
-- Place half the ziti noodles on the bottom of the pan
-- Place 6 slices of provolone as a layer
-- Spread half the cream cheese mixture over the provolone slices
-- Top the cream cheese mixture with your sauce
-- Repeat once more (rest of ziti, provolone, cream cheese, remainder of sauce)
-- Top sauce with torn pieces of your mozerella slices and your shredded parmesan cheese
- Bake for 30 minutes and allow to cool for 5-10 before eating. Mangia!

 My salt and pepper bird shakers are like... "Dude that looks nom, right?"

Tuesday, February 23, 2010

Annie's Baked Potato Soup


I have done it! Another original recipe - this time for baked potato soup. I'm a bit of a starch fanatic and potatoes are definitely one of my dearest food loves. When I get baked potato soup at restaurants, I'm always a bit put off the base is more "cream of potato" and less "delicious cheddar." On that note, please enjoy this Annie recipe for the slow cooker!


Ingredients:
- 2 small cans of Campbell's Cheddar Cheese Soup
- 1 16oz. can of Chicken Stock
- 1 small can of Campbell's Cream of Mushroom
- 6 medium sized russet potatoes, diced in medium to small pieces (the bigger the pieces, the longer in the crock pot)
- 1/2 of a yellow onion, diced
- 6 strips of bacon, crumbled into small pieces
- Green onions (Optional)
- 1/4 cup Colby Jack Cheese, shredded (Optional)
- 1/4 cup White Cheddar Cheese, shredded (Optional)


Directions:
Combine the following ingredients: all of the soups, the diced potatoes and onions, and 3 strips of bacon in a crock pot and set to cook for 5-6 hours on HIGH. The potatoes will take a long time to cook, fyi.


With about an hour left to go, add most of the colby jack and white cheddar to the crock pot mixture. Set the rest aside as a topper.


When you're ready to serve, sprinkle green onions, crumbled bacon (from the 3 remaining strips), and the remaining cheese on top. Voila! Awesome in a bowl. 


Friday, February 19, 2010

One-Sentence Dinner: BBQ Crock Pot Chicken

 
There's nothing Gus and me hate more than dealing with defrosting then cutting raw chicken! Grrroosssss... That's why I love this recipe I'm going to share with you today. It's delicious, easy, and best of all- you can use frozen chicken to achieve awesomeness!

Here's what you need to do in one glorious sentence:

Combine frozen chicken breasts, 1/2 cup of Italian Salad Dressing, 2 teaspoons of Worcestershire Sauce, and 12 oz of your favorite bottled BBQ Sauce and cook in crock-pot for 3-4 hours on high or 6-8 hours on low. 


Here's the ingredients listed for ya:
- 3 Frozen Chicken Breasts (or Fresh, whatever ya like)
- 1/2 cup of Italian Salad Dressing
- 2 teaspoons of Worcestershire Sauce
- 12 oz. of your fave BBQ Sauce (Trader Joe's... amazing)
- Veggies to slow cook (if you want) - we added cut up yukon potatoes and sliced onions

When everything is done cooking, shred the chicken (it will shred super easy) and it'll soak up the delicious, somewhat spicy sauce. I originally found this recipe on AllRecipes here.

Happy chicken cooking! Have a wonderful weekend all.

Monday, February 1, 2010

Make these cookies

Browned Butter Chocolate Chip Cookies... nom!

I spotted this recipe over at Artful Food Blog and knew it was something I had to do on my Sunday morning (Brunch, you are so last year.) I was pleasantly surprised when the "browned butter" tasted and smelled almost like caramel and gave these chocolate chip cookies the most rich and incredible taste!

I highly recommend you giving the recipe a try. The author suggests refrigerating 24-36 hours but I baked almost immediately after a few minutes in the fridge. They looked too good. I think this is probably why they have flat edges but hey- they tasted amazing!!

The only other substitution I made was omitting the walnuts. These babies were great on their own. Happy Baking!


Tuesday, January 26, 2010

Easy Dinner - BBQ Pork in the Crock Pot


Recently, I created my own amazing Steak Marinade. Continuing on my marinade roll... I give you - BBQ Pork in the Crock Pot ala Annie... (the title is still under construction). Anyway, this is pretty simple, very delicious, and very easy. 


Ingredients:
- 1 pork tenderloin (I used prepackaged from Costco; you could also probably use other cuts of pork that are cheaper)
- 1/3 cup of olive oil
- Dash of red chili pepper flakes
- 1 teaspoon salt
- 1 teaspoon black pepper
- 1 tablespoon of minced garlic
- 1 tablespoon of dijon mustard (I use Trader Joe's Garlic Mustard Aioli)
- 1/4 cup of apple cider vinegar
- 1 tablespoon of lemon juice
- 1/2 or 3/4 of a cup of your favorite barbeque sauce (used Trader Joe's)
-1/3 cup of ketchup


Directions:
Place the pork in a large crock pot. Combine all of the other ingredients and mix well. Pour over the pork and set to cook on low for 5-6 hours. When it's done, the pork will be falling apart deliciously.


Hope you enjoy! As much as I've enjoyed marinade making, I recently made some amazing cookies so I'll be sharing that recipe in an upcoming post. Stay tuned!

Friday, January 15, 2010

An original steak marinade


I have done it! After many other recipe tries and never finding the 'one,' I concocted a new favorite for Gus and me's culinary adventures: my own steak marinade. Since I like to share the awesome on this blog - here it is for you, in case you're planning to make any delicious steak over the holiday weekend!

Ingredients (enough six small boneless tri-tip steaks):

1 cup olive oil
1/2 cup red wine vinegar
1/4 cup lemon juice
1 teaspoon black pepper
1 teaspoon salt
1 tablespoon Worstershire Sauce
1 tablespoon garlic cloves
A dash of dried red pepper flakes (optional)
1 tablespoon of dijon mustard (I like Trader Joe's Garlic Mustard Aioli)
1 entire packet of Lipton's Onion Soup Mix


Directions:
Combine ingredients above in a cup or other pourable container. Place steaks in a deep pan. Cover steaks with marinade and refrigerate for at least an hour before grilling them. Marinating for 24 hours is the most yummy way to go.


Happy cooking!

Wednesday, January 6, 2010

Martha Stewart Salmon... Seriously


On one of my recent trips across the country, I indulged in buying an issue of the monthly tome on all things awesome, Martha Stewart Living. I'm sorry folks, I know she's cliche, but she's nonetheless a cliche worth consulting. I don't know how her and her staff keep innovating- but somehow they do!

Over my stay-cation (between Christmas and New Year's), Gus and I attempted to recreate some Martha-awesome with the following recipe for Seared Salmon with Horseradish and Scallions. Our attempt was mucho successful and very decidedly yummy.


You give it a whirl and let us know what you think! Super quick and chic- Seared Salmon with Horseradish and Scallions, courtesy of our lady Martha.


Ingredients:
2 filets of salmon, skin removed (you can use more if you wish, just increase the amts below of other ingredients)
2 green onions/scallions chopped
1 tablespoon of prepared horseradish
2 tablespoons of olive oil
Salt and pepper to taste


Salmon searing in the pan, horseradish side up.

Directions:
PRE-HEAT oven to 375 Degrees. Season both sides of the salmon with salt and pepper. Spread horseradish on the skin removed side of each filet - enough just to cover it evenly.


HEAT oil in an oven-safe skillet at medium-high heat (careful not to let the oil smoke). Add the salmon, horseradish side up, to the skillet and leave for 2 minutes in the hot oil (searing the other side).


Without flipping the salmon filets, TRANSFER skillet to the oven and bake until the salmon is at your desired consistency. Martha suggests 6 minutes, Gus and I did more like 12 because we prefer salmon cooked all the way through.


SERVE warm and topped with scallions. Total time for this recipe is roughly 15-20 minutes including prep. 

Delish! Happy cooking and thanks Martha.


Monday, January 4, 2010

New Year, New Recipe


Happy New Year's everyone! 2009 was an incredible journey for me - lots of highs, some lows, and tons of challenges. 2010 looks like it has even more in store now that I've started this blog, am getting back into screenwriting, and am investigating new work possibilities! (How's that for cryptic?) 


Anyway, this week should be a good one for Living with Annie. I'll have a few new recipes, a new craft, and a very exciting REVEAL of my Stay-cation major decorating project on Friday!

Today, I'm sharing a recipe recently made by my dear friend Ooroo (also known as Laura). I'm hoping to share more of her crafty work later this week and in the future, so be on the look out for it.


Without further adieu, Ooroo's Mint Chocolate Bark! (Originally found here at meals.com)


Ingredients:
1 2/3 cups (10-oz. pkg.) NESTLÉ® TOLL HOUSE® Dark Chocolate & Mint Morsels
1/3 cup coarsely chopped oven roasted or toasted almonds (Laura says to toast them in the oven on 300 degrees)


Directions:
PREHEAT oven to 325° F. Line small baking sheet with foil or parchment paper.

POUR morsels onto prepared baking sheet. Arrange morsels so they are touching each other in a single layer (roughly an 11 x 9-inch rectangle).

BAKE for 1 to 3 minutes or until morsels are shiny. Remove from oven to wire rack. With tip of butter knife or wooden pick, immediately swirl morsels to create a swirled pattern.

SPRINKLE with nuts. Hold baking sheet 3 inches above counter and drop to settle nuts into melted morsels. Refrigerate for 1 hour or until firm. Break into pieces. Store in airtight container in refrigerator.


VARIATION: Substitute broken pretzel pieces or another nut of choice for the almonds. 


Minty chocolate-y goodness. Thanks Ooroo for the inspiration!

Wednesday, December 23, 2009

Baked Oatmeal (in a pinch)


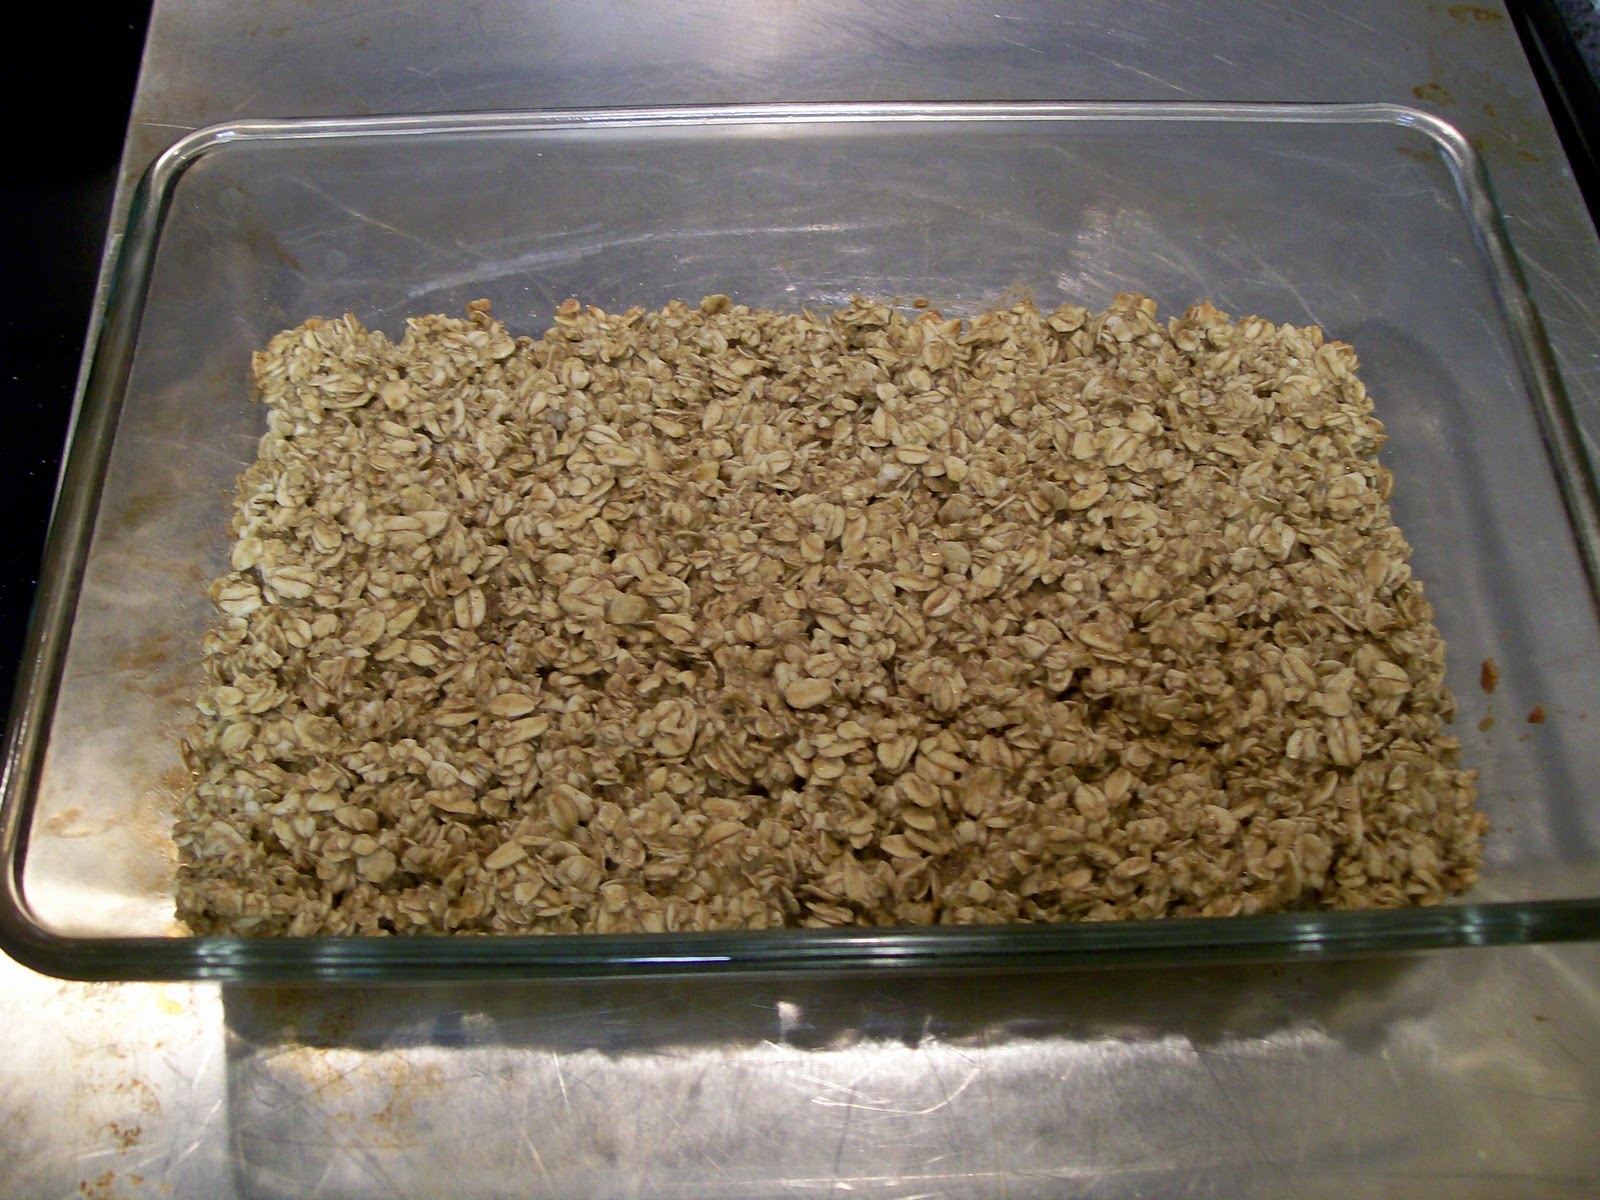
One of my friends from college makes a great baked oatmeal. It feeds tons of people and is super yummy topped with milk or ice cream. Never had baked oatmeal before? Boy, you have not lived until you have tried it. Imagine something the consistency of an oatmeal cookie topped with baked cinnamon and sugar - nom!

Here's the recipe from my friend (who got it from a friend of his). Be sure to size this down and note my awesome substitute for milk!


Krista's Baked Oatmeal (provided to me by M@)


INGREDIENTS:
1 1/4 C oil
2 1/2  C milk (or French vanilla ice cream which I subbed in a pinch)
2 Tbs cinnamon
2 1/2 C sugar (brown or white) (I like a mixture of both)
2 1/2 tsp salt
5 eggs (beaten)
7 1/2 C oatmeal (dry)
5 tsp baking powder 


DIRECTIONS:
Cream together sugar, oil, and eggs. Add oatmeal, baking powder, salt, milk and cinnamon. Put in 9 x 13 in pan that has been greased. Bake at 350 degrees for 30 minutes. ENJOY! 

I like to eat mine with ice cream... and apparently, bake it with ice cream too. Delish! Happy breakfast.  


Tuesday, December 22, 2009

Annie - the award-winnning baker


I was hoping this day would come at some point in my life- the day I’d actually win an award for something I whipped up! Indeed, that day has come. Last week, I made my own spin on Bakerella’s cake pops – Mickey and Minnie Cake Pops – for our Charity Bake Sale. They turned out great and much to my delight, I was awarded a Golden Spoon (an amazing wooden spoon wonderfully spray-painted in gold) for “Best Candy.” Yeah, I still got it.


Anyway, here’s a brief rundown and the recipe if you’d like to make your own this holiday season!

Cake Balls are basically just cake mixed with frosting, rolled into balls, then dipped in chocolate. They are a staple of an amazing baker/blogger known as Bakerella. If you'd like more background on them, check out my earlier post- Cake Balls of Deliciousness.


If you'd like to make these scrumptious award-winnng Disney-themed pops, here's what you'll need:


For the cake and cake/frosting mixture  -
- Devil's food cake mix
- Eggs and vegetable oil (enough to bake the mix as normal)
- 1 can of Cream Cheese Frosting

For decorating the cake balls - 

- One box of Junior Mints
- Red heart sprinkles
- Wilton's (or any other brand) dark cocoa melting chocolate
- Lollipop sticks
- Red sugar sprinkles (optional)

For presentation - 
- A long foam block
- Gift wrap


DIRECTIONS
1. Prepare cake as directed and allow to cool for at least an hour.
2. Crumble cake into fine particles with your hands into a large bowl.
3. Add an entire can of cream cheese frosting. Mix evenly.
4. Roll the mixture into small, 1 inch balls and place on wax paper. Refrigerate (overnight) if you can.

5. When you're ready to decorate, melt your melting chocolate in a deep bowl according to the directions on the package.
6. Dip the tip of each lollipop stick into the melted chocolate then straight down into the cake balls on your wax paper. You are making cake on a stick here, essentially.
7. Once you've completed that step and the melted chocolate on the stick has been able to set, use the lollipop stick to dip the cake ball into the chocolate. Tap the stick towards the top (towards the cake ball) to drip off excess chocolate.
8. Working VERY quickly, attach two Junior mints as the ears (be sure to press down a little bit into the chocolate/cake ball) then two red heart sprinkles sideways to form a Minnie bow (if you are making Minnie). The chocolate dries in a matter of seconds! If it sets before you can get the bows on (which happened to me several times), dip one side of the red heart sprinkles back in the chocolate and use it as glue to attach. Repeat the same for any ears that might fall off.
9. Allow to dry by stuffing the lollipop stick down into a large foam block. It should hold the pop in place when it dries. Repeat! Just one box of cake mix will literally make nearly 50 pops if you need em so get crackin.


10. To make the display, remove all the pops from the foam block and lay them on wax paper (as long as they have set, they will be fine for the time being).
11. Wrap the box in your chosen gift wrap (I used holiday theme). Then set the pops back down into the styrofoam - and voila, cake pop display!


Alternative: You can also cut out circular labels and poke a hole in the top and bottom for the pop to go through. Great for giving individual pops as gifts!


That's it for me today. Hope you have fun making your own cake pops! Good luck on getting your own golden utensils. I heart mine.

Tuesday, December 15, 2009

Oh Dreidel, Dreidel, Dreidel - I made you out of chocolate


Martha Stewart is without a doubt incredibly inspirational. While winging our way back from NC over Thanksgiving, I found this great idea of making dreidels from marshmallows and Hershey kisses.


I took a chance and surprised my group of 20-something friends with the dessert activity of making them. Would this group take to making the dreidels as a silly, more 6 year-old appropriate, dessert craft? You betcha.


And I quote one party-goer,
“the most fun I’ve ever had making dessert.”

Here’s how you can get your own Martha on this Hanukkah:

Ingredients –

1 can of chocolate frosting (your preference, I chose Milk Chocolate Whipped since it’s easy to spread and delish)
1 package of large marshmallows
1 package of pretzel sticks
1 package of Hershey Kisses (your preference, I went with the classic milk chocolate variety)
Strawberries (optional)

Directions – 

1) TAKE one marshmallow and apply frosting to the bottom of it.

2) ATTACH one Hershey kiss and attach its bottom to the frosting.

3) INSERT a pretzel stick down into the center of the marshmallow (to be the dreidel top).

4) EAT! Or…

5) COVER the entire thing in chocolate frosting. Then EAT!


6) Or… (you’re seeing now why this is a fun activity, right?) Instead of the Hershey kiss, attach a fresh strawberry, cover in chocolate, then EAT!


Ah, sweetness and something to do. That’s what I call a great craft. Thanks Martha. Happy fifth night of Hanukkah to all!


Check out my spiffy impromptu tealight menorah below. Not being able to find my real menorah was definitely a big inspiration here.


Monday, December 14, 2009

Potato Pancake Perfection


Happy 4th night of Hanukkah tonight to everyone!

This weekend, Gus and I made delicious latkes (potato pancakes) for brunch and they were mucho yummy. I dare to say that they are perhaps the best latkes I've ever made or eaten! I'm especially proud because I concocted my own recipe AND managed to make them gluten-free. Huzzah, I am officially the coolest Hanukkah chef ever.


Anyway, without further adieu, here is how you can master amazing latkes with my official recipe! 

One short warning before you get started - frying these will make your house smell intensely like a restaurant and oil will penetrate everything! Literally, my bathroom towel smelled like latkes. I recommend keeping your windows open, running the fan, and saying a prayer or two. 

The best remedy for the smell ironically seemed to be cooking something different - in my case, ordering pizza soaked up everything well. I also think some vanilla candles helped. :)


Ingredients:
- 2 cups frozen shredded potatoes (defrosted/thawed to room temp)
- 3 eggs
- 2 tablespoons of Gluten-free baking mix OR all-purpose flour
- 1/3 cup of chopped yellow onions
- Vegetable oil
- Your seasoning preference amount of salt, black pepper, and garlic powder
- Scallions (optional)


Directions:

COMBINE the potatoes, eggs, baking mix (or flour), onions, and your desired amounts of salt, black pepper, and garlic powder. I used a small sprinkling of each seasoning. 

HEAT a medium-sized skillet on medium-high heat with about 1/2 - 1 cup of oil. Use enough so there's is 1/4inch of oil covering the bottom of the skillet.

Once the oil is sufficiently hot enough, DROP a small spoonful of your potato mixture into the oil. Use a fork to press down on the patty and let it sit for 1-2 minutes (or until the side in the oil turns golden brown). FLIP the patty when ready and allow it to get golden on the other side.

REMOVE the potato pancake from the oil and allow to drain on paper towels.

TOP with a sprinkling of salt, a few chopped scallions, and serve warm. Nom!


Tune in tomorrow for a Hanukkah treat that has been deemed by a friend, "the most fun I've ever had making dessert!"


Related Posts with Thumbnails