Recent Posts
Showing posts with label Baking. Show all posts
Tuesday, January 11, 2011
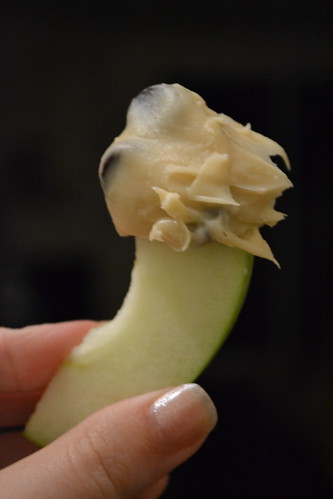
Cookie Dough... Dip
Posted by
MsAnnieBelle
Scientists have done many important things, admittedly, but their latest discovery is one I wish I'd thought of long ago - CHOCOLATE CHIP COOKIE DOUGH DIP! All the great things about cookie dough - the texture, the flavor, the sinfulness - without all the health hazards of cookie dough - i.e. raw eggs and wheat flour (for Gus)!
I stumbled upon this recipe while perusing Tastespotting and made my own modifications. Create, enjoy, improve and mangia people! This is some deliciously awesome stuff.
Ingredients:
- 1 pkg of cream cheese (8 oz)
- 1/4 cup powdered sugar
- 1/4 cup big granule white sugar (if you have it, otherwise increase powdered)
- 1 stick of butter (1/2 cup)
- 3/4 cup brown sugar
- 3/4 cup of semi-sweet chocolate chips
- Any additional mix-ins you'd like!
Directions:
1. Melt butter on medium-low heat in a skillet. Add brown sugar and stir until butter browns and has a nutty aroma (you're creating brown butter).
2. Set butter and brown sugar aside to cool. Combine cream cheese and remaining white and powdered sugar.
3. Add butter/brown sugar mixture to the cream cheese mixture. Combine and add chocolate chips/any other mix-ins.
4. Serve with sliced granny smith apples, graham crackers, or even a bagel! Hey, it's basically Cookie dough cream cheese after all! Nom!
Thursday, December 30, 2010
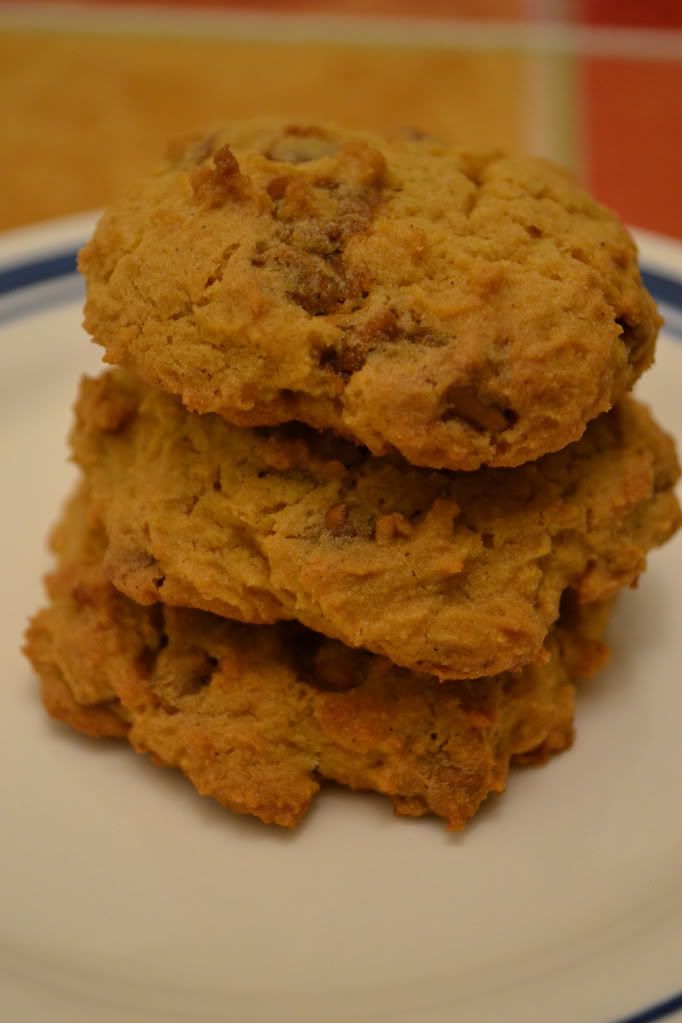
Om Nom Pumpkin Chip Cookies
Posted by
MsAnnieBelle
Hope you all have had a wonderful holiday season! I've got a few treats in store including the news that I now have a blog-worthy DSLR camera to capture all my memorable moments.
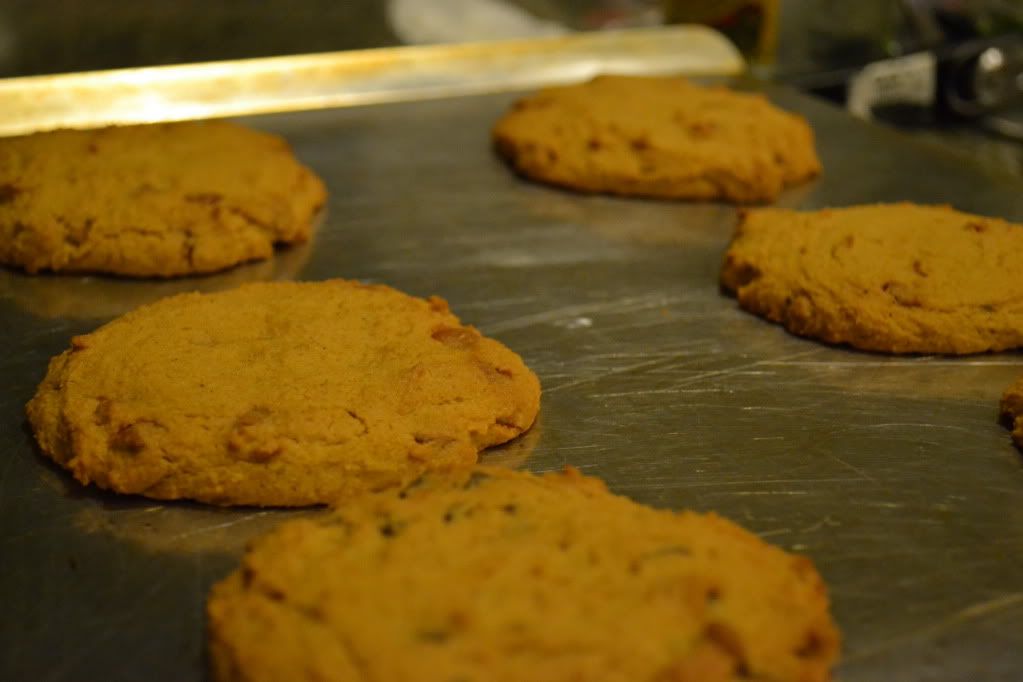
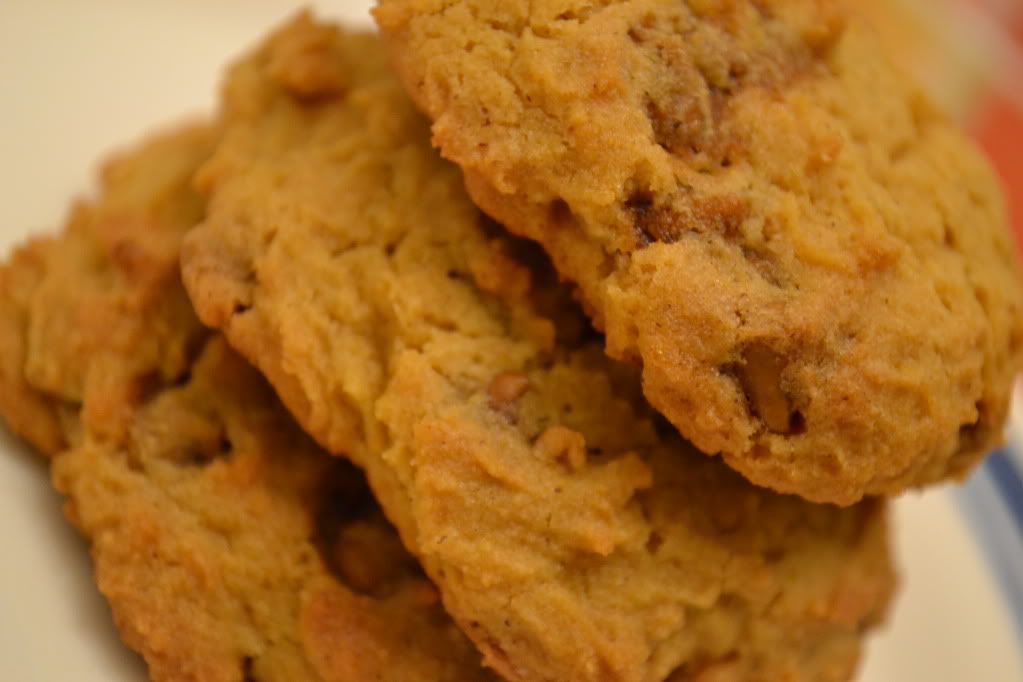
For Christmas Day this year, we managed to make some pretty amazing and somewhat healthy (cough, cough) cookies that were both gluten-free and DELICIOUS. They're very cake-y and moist and stay that way for days on end! The pumpkin flavor isn't too overpowering either. I mixed cinnamon chips in half the batch, chocolate chunks from Ghiradelli in another. Om nom, indeed.
Here's the recipe if you guys want to make these- I've adapted it slightly from this one at All Recipes and it can be made gluten-free or with regular wheat flour. I didn't make the icing glaze- it didn't need it!
Another great thing to note- these cookie did not spread when I baked them! So feel free to shape em how you please and they won't get all thin and run into one another all sloppy like.
Happy Baking!
Ingredients:
2 1/2 cups all-purpose flour
(or gluten-free flour mix that has xantham gum in it)
1 teaspoon baking powder
1 teaspoon baking soda
2 teaspoons ground cinnamon
1 teaspoon pumpkin pie spice
1/2 teaspoon salt
1/2 cup butter, softened
3/4 cup white sugar
3/4 cup brown sugar
Directions:
|
1 cup canned pumpkin puree
1 egg
1 teaspoon vanilla extract
3/4 cup of cinnamon chips or chocolate chips (your choice or mix-it-up!)
|
Monday, October 18, 2010
Hello apple pie, Goodbye gluten
Posted by
MsAnnieBelle
As you have probably noted by now, I'm trying to do a lot of gluten-free cooking and baking as my sweetheart has developed an allergy to gluten (i.e. wheat) so all delicious things made with wheat flour are off the table. I'm starting to get relatively good at making meals but the big challenge with gluten-free cooking is getting things to taste "chewy." Gluten basically provides that in things like bread, cake, muffins, and it's pretty hard to replicate if you haven't practiced and aren't using the right ingredients.
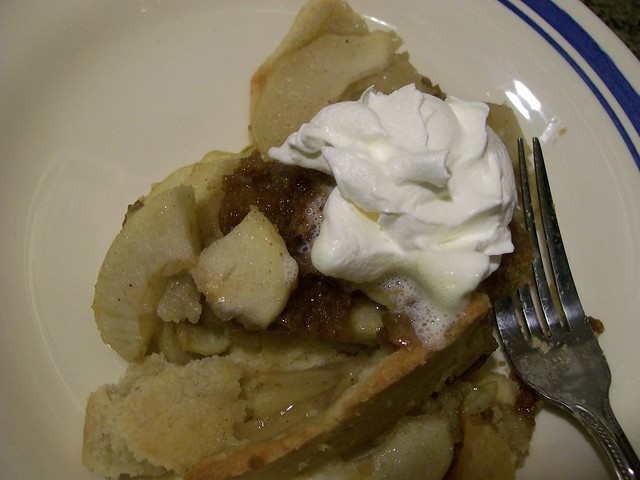
Gus and I recently got a major yen for apple pie and I decided I was up for the challenge. So we googled, and huzzah, made a delicious gluten-free Apple Pie with a crust that tasted like a sugar cookie!
I urge you to make this, even if you and wheat are BFF. You'll love it.
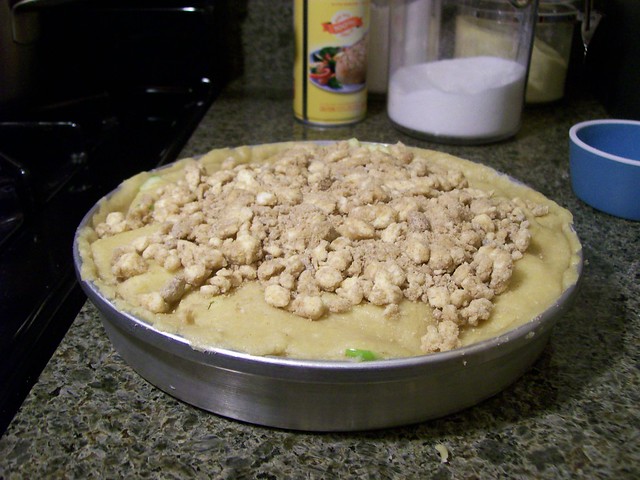
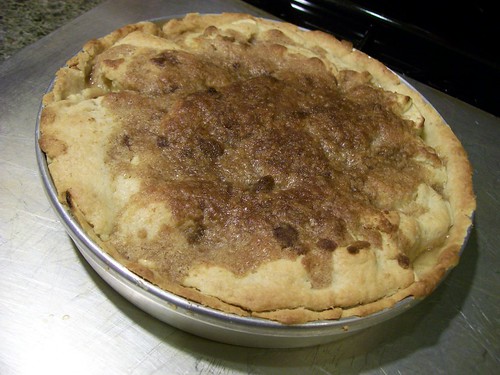
Awesome Gluten-free Apple Pie with Crumb Topping
adapted from food.com
Ingredients
Pastry Crust Makes Two Crusts
- 1 1/2 cups gluten-free flour ( Bob's Red Mills All Purpose Gluten Free Flour, Avail at Kroger & online)
- 1/3 cup cornstarch
- 1/2 cup sugar
- 1 teaspoon xanthan gum ( Bob's Red Mills)
- 8 tablespoons butter, cut into pieces
- 1 large eggs
- 1 tablespoon gluten-free vanilla extract ( Available online at the Gluten Free Pantry)
- 4 medium apples, peeled, cored and very thinly sliced. Use mildly sweet to tart very crisp apple ( such as Granny Smith, Braeburn, Cortlands)
- 1/2 cup sugar
- 1 teaspoon ground cinnamon
- 1/4 teaspoon ground pumpkin pie spice (or nutmeg)
- 1/4 teaspoon salt
- 3/4 cup light brown sugar
- 3/4 cup gluten-free flour ( See above)
- 1/2 teaspoon ground cinnamon (or nutmeg or pumpkin pie spice)
Apple Filling
Crumble Topping
Directions
***Pastry Crust Instructions***.
- In a mixing bowl stir together the flour, xanthan gum and cornstarch.
- Then add the sugar, butter, egg and vanilla and mix until combined.
- Remove dough from bowl and knead and fold on a surface dusted with GF flour until well well combined.
- Divide into two pieces and wrap in plastic wrap, place one in the refrigerator to chill and place the other in the freezer for later use.
- --Go ahead and make Apple Filling while the Pastry Crust is chilling.
- After approx 20 minutes, remove dough from refrigerator and roll into a ball.
- Using a rolling pin, roll the dough out on a lightly GF floured surface until it is the thickness of a normal pie crust.
- Place crust in a 9 inch glass pie dish that is lightly sprayed with non stick spray.
- Using a fork poke a bunch of holes in the sides and bottom of the crust.
- In a large bowl mix apples, sugar, cinnamon, pumpkin pie spice and salt.
- Set aside and let the juices mix.
- In small bowl mix together brown sugar, GF flour and cinnamon.
- Next mix in the chilled butter and cut it in with a fork or other tool until you have a course crumbly mixture.
- Preheat oven to 400°F.
- Spoon apples into your pie crust, mounding in the middle and pouring the sugary juices over top.
- Sprinkle your Crumble Topping all over the top (use it all).
- Use tin foil to cover edges of crust as it will burn easily.
- Bake for approximately 35 minutes, topping will be lightly browned and filling will be bubbly.
- Let cool for at least an hour before serving.
Monday, October 4, 2010
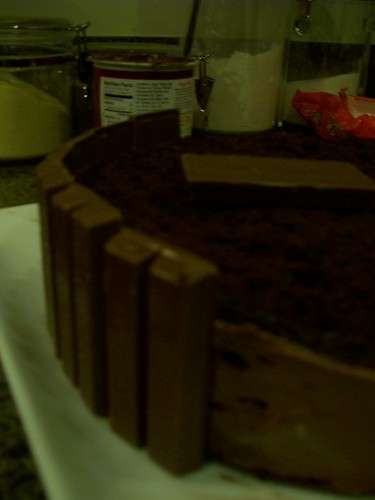
Break me off a piece of that Kit Kat Cake
Posted by
MsAnnieBelle
Yes- this post is exactly what you think it is, you lovers of all things chocolate and wafer. My boss is a big fan of the red wrapped treat - KitKat. So much so, that I've stashed away his favorite treat, frozen as he prefers, and he often asks me to grab one for him when the day's just getting too stressful.
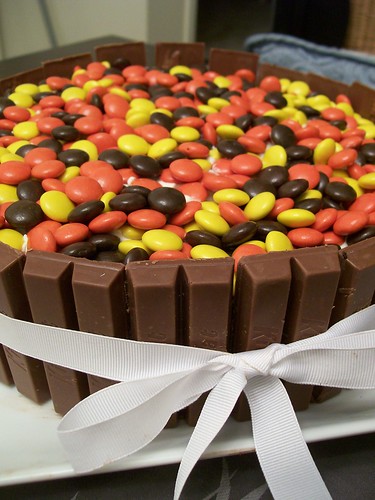
His birthday is in about 10 days but he'll be away on a business trip then a vacation. Last Friday was our last opportunity to catch him for the big day and I figured what would be better to celebrate his love and celebrate my one year of blogging with a most delicious KIT KAT CAKE!
With that my friends, here's how to make your own slice(s) of heaven. This cake was inspired by others I found on the web but hey, I love a great baking opportunity and wanted to pass it along to you.
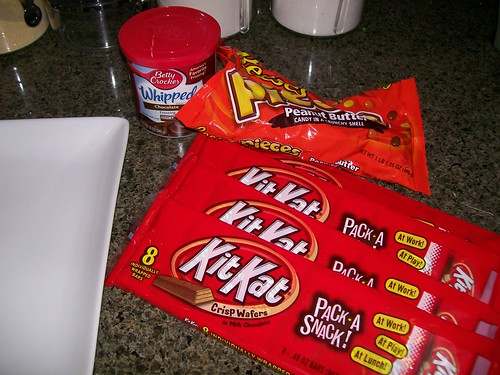
Ingredients and Supplies:
- 1 pkg Triple Fudge Chocolate Cake Mix (any chocolate cake mix works, even Gluten-Free)
- 1 8oz tub Real Creamy Cool Whip
- 1/4 can of chocolate frosting
- 1 large package of Reese's pieces or your favorite chocolate round candies (M&M's, etc.)
- Approximately 24 KitKats (regular size)
- 1 long white ribbon - at least 24"
- 2 9" round cake pans
- Pam
- Large plate
- Serrated knife
Directions:
1) Prepare to make and bake cake mix as directed. Divide batter into two Pam-greased 9" in round cake pans.
2) Bake cakes as directed on your cake mix packaging.
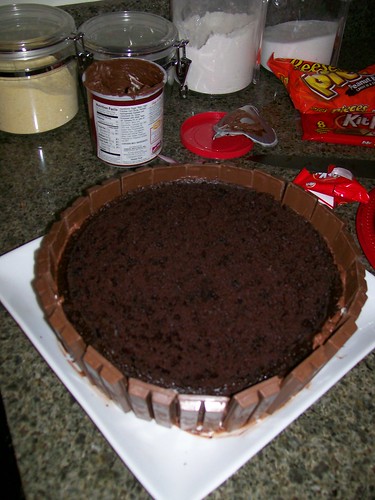
3) After the cakes have cooled, slide one layer onto a large plate. Use a serrated knife to even out the top of the cake if it rose while baking.
4) Top that first layer with approximately 1/3 a tub of cool whip.
5) Slide the second cake layer centered on top of the cool whip and first cake layer - forming a delicious cake sandwich. Yum!
6) Use the serrated knife again to level off this top layer- this will be your base for the 'barrel' insides where your candy lays. You'll want the cake layers to come up no higher than 2/3 the height of your kit kats. Feel free to open one to use it as a measure.
7) Once your cake sandwich is level, top the second layer with a thin spread of cool whip. This will act as your glue, making sure that the candies stay somewhat on top of your cake when you slice into it.
8) Now, for the Kit Kat border! To "glue" your border to the edges of your cake, use a thin layer of chocolate frosting. Then have a friend (in this case, my sweetheart) help you unwrap 24 kit kats!
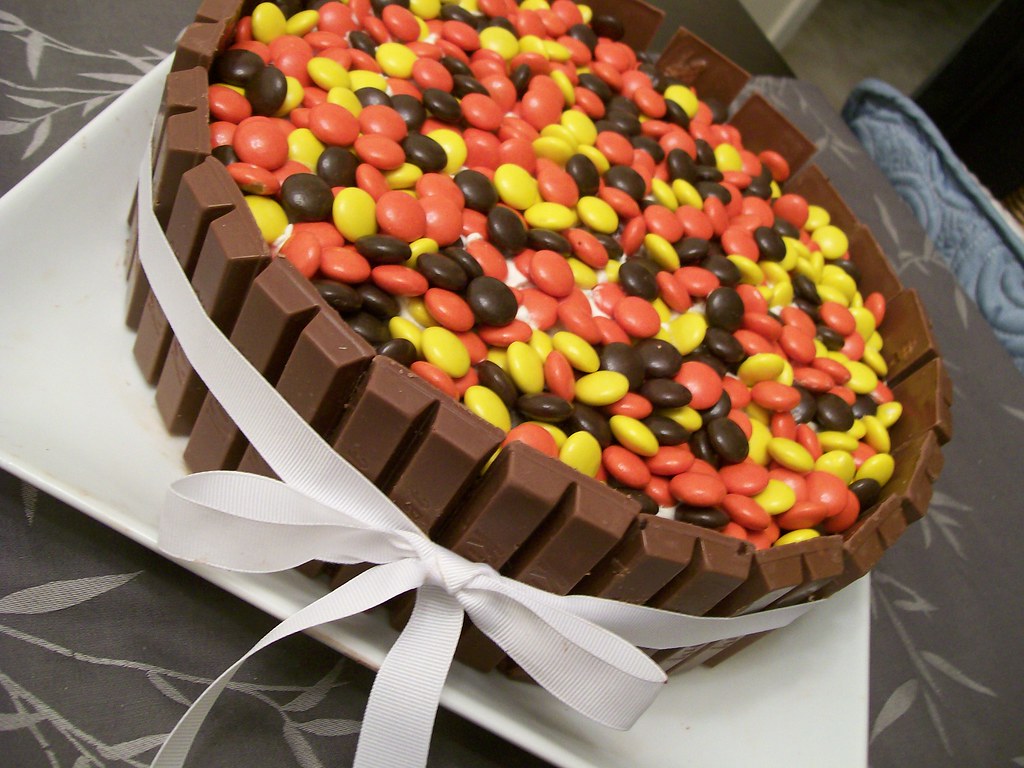
9) Attach the kit kats with the kit kat logo facing outward around the cake, using the frosting to help it stick to it.
10) Take your white ribbon (or whatever color ribbon you like) and run it around the middle of your cake - tying a secure but pretty bow at the front.
11) Last but not least, pour your bag of Reese's pieces or candies on top of the cake - spreading them out evenly, and filling your brand-new Kit Kat cake bucket :)
I was blown away by one - how easy this cake was and two- what a big hit it was! We were worried about surprising my boss since his last day in the office had been incredibly stressful. The day was dwindling down to a close when amazingness happened and he turned to me and said simply, 'Annie - Kit Kat.'
This was the moment! I raced to the fridge and rounded up the office and presented him with 24 kit kats + a cake. Suffice it to say, it was momentous.
And that's kinda how I feel returning to blogging. I've been stressed, distracted, pulled away by other interests and lots of new changes - but at the end of the day - well, end of this year- I've realized it's time for a kit kat. Time to cut lose. Time to get creative again. Glad to be back and thanks for all your support thus far - happy one year blogging anniversary to me!
Friday, April 23, 2010
A Very Muppet Marriage
Posted by
MsAnnieBelle
Spotted these today on a wonderful blog for cupcake bakers, Cupcakes take the Cake. Muppet WEDDING cupcakes! I am about dying right now. Kermit and Piggy forever <3
Check out more, here. Happy weekend!!
Monday, March 22, 2010
Weekend Kitchen Nightmares: Rubber Lemon Cake
Posted by
MsAnnieBelle
Yeah.. should have done a little more research into gluten-free baking. What I ended up with is something I've never quite seen before. It is almost a dense, rubber-like consistency that has the appearance of a very deep dish pizza crust. The good news is that it's kind of tasty with buttercream frosting on top (what isn't though?) and Gus likes eating it with a cup of tea.
For now, I'm sharing just to demonstrate that we all have our kitchen disasters. The last one I had were chocolate chip cookies that spread so much, I had to put them in muffin tins to bake them.
Hope everyone had a lovely weekend!
Wednesday, February 3, 2010
The Internet for Bakers
Posted by
MsAnnieBelle
Those of you who read this blog often, may have noticed that I really enjoy baking. I've even considered opening up my own side or full-time business devoted to it. I love how relaxing it can be and the deliciously creative results it can yield. All of the recipes for the above photos can be found on the right-hand sidebar, just go to "Living with Annie Recipes."
For today, I'd like to share with you some of the best internet baking inspiration I've found. I highly encourage you to follow these sites if you share my passion.
Like Google for food, but fantastically better. These are two visual search engines that usually contain links to great blogs and recipes. You can even submit your own!
Cake pops, cake pops, cake pops (see Mickey and Minnie versions of mine above)! Her photos are just as gorgeous as her innovative baking and decorating ideas. She never fails to amaze. Follow this one if you aren't familiar, you'll be very glad you did.
Ree Drummond, aka Pioneer Woman, is on the rise as an entertaining cook that posts fantastic pictures and equally fantastic recipes on her food blog. She also just released a cookbook.
One of my passions is the universe of cupcakery. A trio of bloggers on this site works diligently to keep you up to speed on cupcake trends all across the country.
How bout you guys? Any great baking sources I should start following?
Monday, February 1, 2010
Make these cookies
Posted by
MsAnnieBelle
Browned Butter Chocolate Chip Cookies... nom!
I spotted this recipe over at Artful Food Blog and knew it was something I had to do on my Sunday morning (Brunch, you are so last year.) I was pleasantly surprised when the "browned butter" tasted and smelled almost like caramel and gave these chocolate chip cookies the most rich and incredible taste!
I highly recommend you giving the recipe a try. The author suggests refrigerating 24-36 hours but I baked almost immediately after a few minutes in the fridge. They looked too good. I think this is probably why they have flat edges but hey- they tasted amazing!!
The only other substitution I made was omitting the walnuts. These babies were great on their own. Happy Baking!
Thursday, January 7, 2010
Spooning
Posted by
MsAnnieBelle
Ladies and Gentlemen... may I present my Golden Spoon - the first baking award I've ever received! Shiny, right?
To see what won me this metallic prize, check out this earlier post.
Also- check back tomorrow for my home decorating project reveal!
Wednesday, January 6, 2010
Martha Stewart Salmon... Seriously
Posted by
MsAnnieBelle
On one of my recent trips across the country, I indulged in buying an issue of the monthly tome on all things awesome, Martha Stewart Living. I'm sorry folks, I know she's cliche, but she's nonetheless a cliche worth consulting. I don't know how her and her staff keep innovating- but somehow they do!
Over my stay-cation (between Christmas and New Year's), Gus and I attempted to recreate some Martha-awesome with the following recipe for Seared Salmon with Horseradish and Scallions. Our attempt was mucho successful and very decidedly yummy.
You give it a whirl and let us know what you think! Super quick and chic- Seared Salmon with Horseradish and Scallions, courtesy of our lady Martha.
Ingredients:
2 filets of salmon, skin removed (you can use more if you wish, just increase the amts below of other ingredients)
2 green onions/scallions chopped
1 tablespoon of prepared horseradish
2 tablespoons of olive oil
Salt and pepper to taste
Salmon searing in the pan, horseradish side up.
Directions:PRE-HEAT oven to 375 Degrees. Season both sides of the salmon with salt and pepper. Spread horseradish on the skin removed side of each filet - enough just to cover it evenly.
HEAT oil in an oven-safe skillet at medium-high heat (careful not to let the oil smoke). Add the salmon, horseradish side up, to the skillet and leave for 2 minutes in the hot oil (searing the other side).
Without flipping the salmon filets, TRANSFER skillet to the oven and bake until the salmon is at your desired consistency. Martha suggests 6 minutes, Gus and I did more like 12 because we prefer salmon cooked all the way through.
SERVE warm and topped with scallions. Total time for this recipe is roughly 15-20 minutes including prep.
Delish! Happy cooking and thanks Martha.
Monday, January 4, 2010
New Year, New Recipe
Posted by
MsAnnieBelle
Anyway, this week should be a good one for Living with Annie. I'll have a few new recipes, a new craft, and a very exciting REVEAL of my Stay-cation major decorating project on Friday!
Today, I'm sharing a recipe recently made by my dear friend Ooroo (also known as Laura). I'm hoping to share more of her crafty work later this week and in the future, so be on the look out for it.
Without further adieu, Ooroo's Mint Chocolate Bark! (Originally found here at meals.com)
Ingredients:
1 2/3 cups (10-oz. pkg.) NESTLÉ® TOLL HOUSE® Dark Chocolate & Mint Morsels
1/3 cup coarsely chopped oven roasted or toasted almonds (Laura says to toast them in the oven on 300 degrees)
Directions:
PREHEAT oven to 325° F. Line small baking sheet with foil or parchment paper.
POUR morsels onto prepared baking sheet. Arrange morsels so they are touching each other in a single layer (roughly an 11 x 9-inch rectangle).
BAKE for 1 to 3 minutes or until morsels are shiny. Remove from oven to wire rack. With tip of butter knife or wooden pick, immediately swirl morsels to create a swirled pattern.
SPRINKLE with nuts. Hold baking sheet 3 inches above counter and drop to settle nuts into melted morsels. Refrigerate for 1 hour or until firm. Break into pieces. Store in airtight container in refrigerator.
VARIATION: Substitute broken pretzel pieces or another nut of choice for the almonds.
Minty chocolate-y goodness. Thanks Ooroo for the inspiration!
Wednesday, December 23, 2009
Baked Oatmeal (in a pinch)
Posted by
MsAnnieBelle
One of my friends from college makes a great baked oatmeal. It feeds tons of people and is super yummy topped with milk or ice cream. Never had baked oatmeal before? Boy, you have not lived until you have tried it. Imagine something the consistency of an oatmeal cookie topped with baked cinnamon and sugar - nom!
Here's the recipe from my friend (who got it from a friend of his). Be sure to size this down and note my awesome substitute for milk!
Krista's Baked Oatmeal (provided to me by M@)
INGREDIENTS:
1 1/4 C oil
2 1/2 C milk (or French vanilla ice cream which I subbed in a pinch)
2 Tbs cinnamon
2 1/2 C sugar (brown or white) (I like a mixture of both)
2 1/2 tsp salt
5 eggs (beaten)
7 1/2 C oatmeal (dry)
5 tsp baking powder
2 1/2 C milk (or French vanilla ice cream which I subbed in a pinch)
2 Tbs cinnamon
2 1/2 C sugar (brown or white) (I like a mixture of both)
2 1/2 tsp salt
5 eggs (beaten)
7 1/2 C oatmeal (dry)
5 tsp baking powder
DIRECTIONS:
Cream together sugar, oil, and eggs. Add oatmeal, baking powder, salt,
milk and cinnamon. Put in 9 x 13 in pan that has been greased. Bake
at 350 degrees for 30 minutes. ENJOY!
I like to eat mine with ice cream... and apparently, bake it with ice cream too. Delish! Happy breakfast.
Tuesday, December 22, 2009
Annie - the award-winnning baker
Posted by
MsAnnieBelle
I was hoping this day would come at some point in my life- the day I’d actually win an award for something I whipped up! Indeed, that day has come. Last week, I made my own spin on Bakerella’s cake pops – Mickey and Minnie Cake Pops – for our Charity Bake Sale. They turned out great and much to my delight, I was awarded a Golden Spoon (an amazing wooden spoon wonderfully spray-painted in gold) for “Best Candy.” Yeah, I still got it.
Anyway, here’s a brief
rundown and the recipe if you’d like to make your own this holiday season!
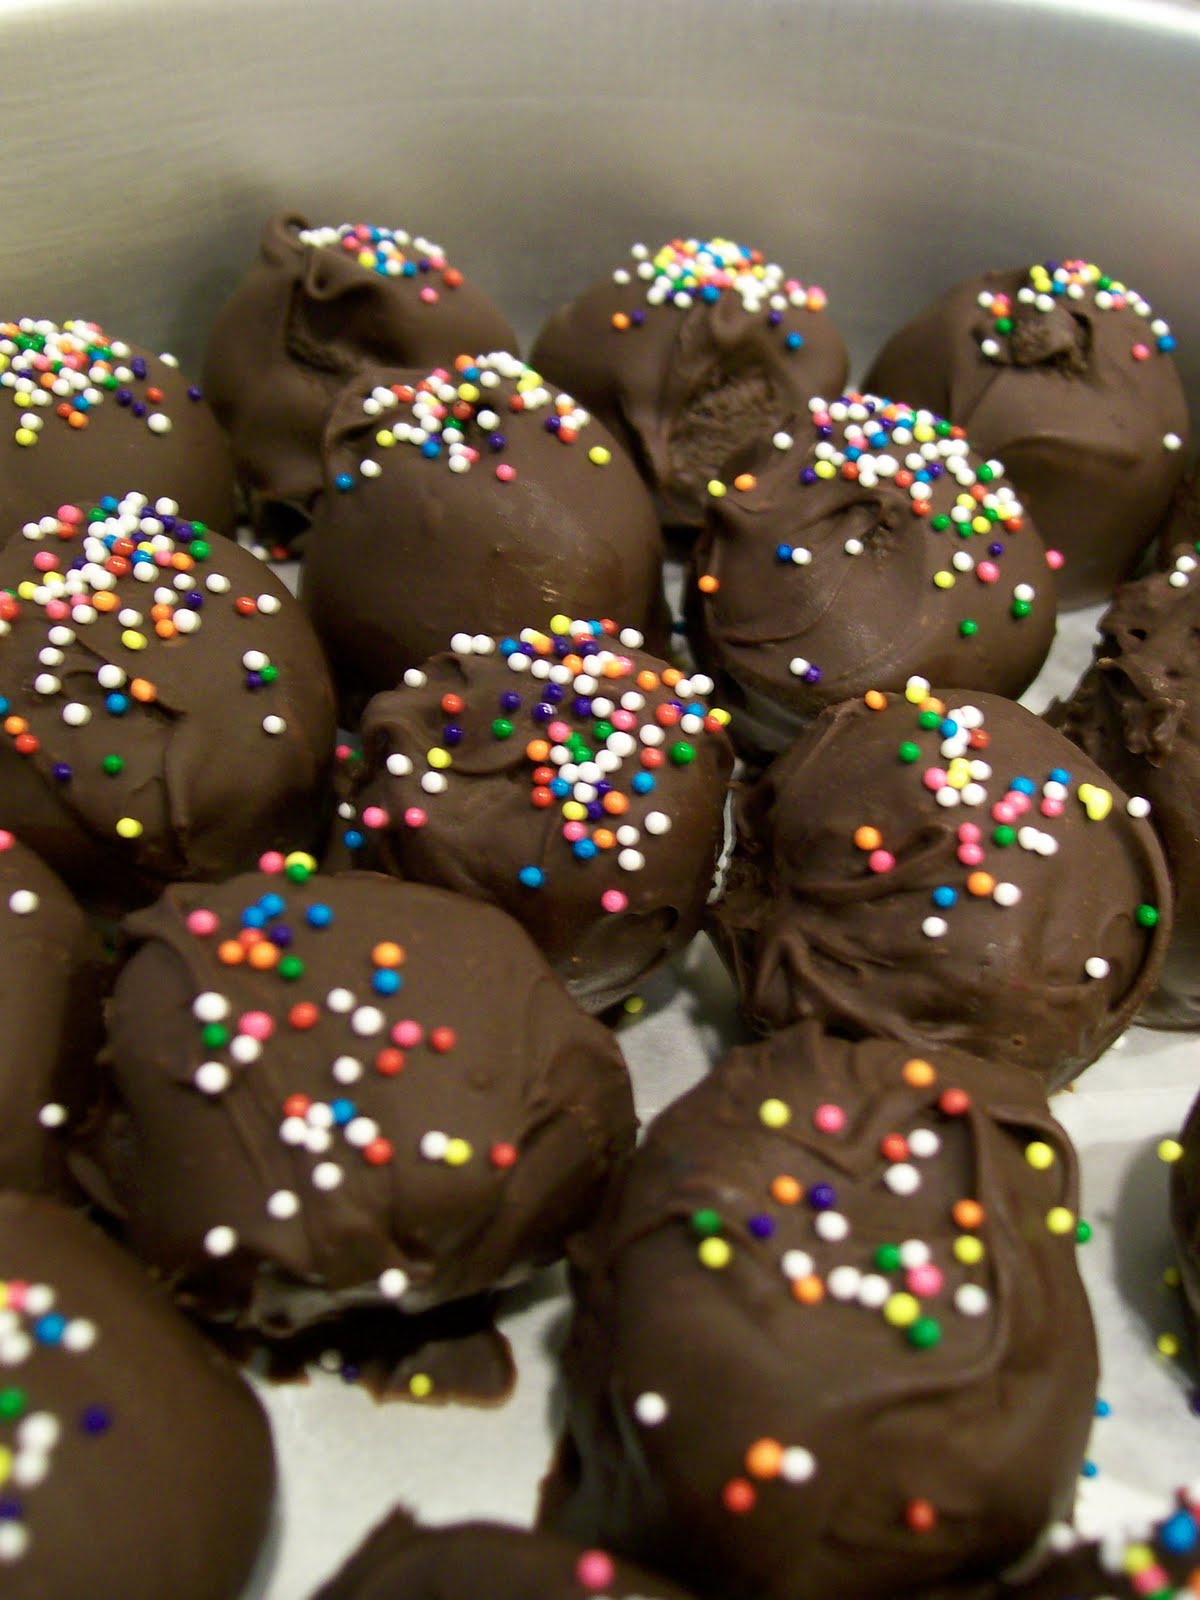
Cake Balls are basically just cake mixed with frosting, rolled into balls, then dipped in chocolate. They are a staple of an amazing baker/blogger known as Bakerella. If you'd like more background on them, check out my earlier post- Cake Balls of Deliciousness.
If you'd like to make these scrumptious award-winnng Disney-themed pops, here's what you'll need:
For the cake and cake/frosting mixture -
- Devil's food cake mix
- Eggs and vegetable oil (enough to bake the mix as normal)
- 1 can of Cream Cheese Frosting
For decorating the cake balls -
- One box of Junior Mints
- Red heart sprinkles
- Wilton's (or any other brand) dark cocoa melting chocolate
- Lollipop sticks
- Red sugar sprinkles (optional)
For presentation -
- A long foam block
- Gift wrap
Cake Balls are basically just cake mixed with frosting, rolled into balls, then dipped in chocolate. They are a staple of an amazing baker/blogger known as Bakerella. If you'd like more background on them, check out my earlier post- Cake Balls of Deliciousness.
If you'd like to make these scrumptious award-winnng Disney-themed pops, here's what you'll need:
For the cake and cake/frosting mixture -
- Devil's food cake mix
- Eggs and vegetable oil (enough to bake the mix as normal)
- 1 can of Cream Cheese Frosting
For decorating the cake balls -
- One box of Junior Mints
- Red heart sprinkles
- Wilton's (or any other brand) dark cocoa melting chocolate
- Lollipop sticks
- Red sugar sprinkles (optional)
For presentation -
- A long foam block
- Gift wrap
DIRECTIONS
1. Prepare cake as directed and allow to cool for at least an hour.
2. Crumble cake into fine particles with your hands into a large bowl.
3. Add an entire can of cream cheese frosting. Mix evenly.
4. Roll the mixture into small, 1 inch balls and place on wax paper. Refrigerate (overnight) if you can.
5. When you're ready to decorate, melt your melting chocolate in a deep bowl according to the directions on the package.
6. Dip the tip of each lollipop stick into the melted chocolate then straight down into the cake balls on your wax paper. You are making cake on a stick here, essentially.
7. Once you've completed that step and the melted chocolate on the stick has been able to set, use the lollipop stick to dip the cake ball into the chocolate. Tap the stick towards the top (towards the cake ball) to drip off excess chocolate.
8. Working VERY quickly, attach two Junior mints as the ears (be sure to press down a little bit into the chocolate/cake ball) then two red heart sprinkles sideways to form a Minnie bow (if you are making Minnie). The chocolate dries in a matter of seconds! If it sets before you can get the bows on (which happened to me several times), dip one side of the red heart sprinkles back in the chocolate and use it as glue to attach. Repeat the same for any ears that might fall off.
9. Allow to dry by stuffing the lollipop stick down into a large foam block. It should hold the pop in place when it dries. Repeat! Just one box of cake mix will literally make nearly 50 pops if you need em so get crackin.
10. To make the display, remove all the pops from the foam block and lay them on wax paper (as long as they have set, they will be fine for the time being).
11. Wrap the box in your chosen gift wrap (I used holiday theme). Then set the pops back down into the styrofoam - and voila, cake pop display!
Alternative: You can also cut out circular labels and poke a hole in the top and bottom for the pop to go through. Great for giving individual pops as gifts!
That's it for me today. Hope you have fun making your own cake pops! Good luck on getting your own golden utensils. I heart mine.
Wednesday, November 18, 2009
Somewhat Less than Seasonal Gingerbread Men
Posted by
MsAnnieBelle
Gingerbread Mer-man, Pop.
Using a recipe similar to this one, we somehow managed to roll out nearly 40+ cookies. Most of them ended up fat or blob-like because we didn't roll the dough thin enough. It's okay, we did not discriminate against them - we ate the fat ones too. Nom.
Anyway, in having so many cookies and only four of us to tackle to the decorating, we got a little stir crazy. That, combined with the fact that our red icing was a decidedly pink color - we went to town on making slightly less traditional holiday men.
Below, you will find our epic creations. I think we've broken the cookie mold when it comes to ginger dessert decorating for Christmas.
Gingerbread Man JAILHOUSE (left to right): Big Stripper Lady, Policeman, Stripper with Syphilis (my friend Tracy is in med school which heavily influenced our decorating), and a Murderer/Serial Killer with a carrot for gun (supposedly a knife according to Chrissy)
Fat gingerbread man no more! I turned him on his side and made him a cuddly turtle.
My friends Pearce and Chrissy. Trust me, they look just like this in real life (except for the fact that Chrissy's skin tone is more like white icing than gingerbread.)
Last, but certainly not least, Gingerbread Man HOSPITAL: (Left to right, top row) Mummy Guy, The Doctor, A Knife Wound Victim, A Headless guy carrying his own head, A guy with Split Personalities, A patient with flesh-eating bacteria. (Left to right, bottom row) Guy who's been run-over by a car, Conjoined twins, Guy who's been taken over by poison ivy, Happy guy with jaundice, Guy with his leg in a cast
So there you have it. I'm currently working on a somewhat non-traditional Christmas/Hanukkah party so stay tuned for a creative holiday season here at LwA.
Monday, November 2, 2009
November - The Unofficial 'Baking with Pumpkin' Month
Posted by
MsAnnieBelle
Annie's Four Layers of Awesome Pumpkin Cake
I'm a huge fan of sites like Tastespotting and Food Gawker - visual search engines of food, glorious food! If you follow these at all or just take a quick look today, you'll notice that baking with pumpkin is in crazy season right now!
In that spirit, I'm sharing my favorite Pumpkin recipe with readers over at my friend Lindsey's blog, Bite Me, in a guest post.
Head over there today to check out the recipe and start baking your own delicious-smelling cake of pumpkin goodness.
(Note: I dislike anything really 'pumpkiny' and this is a really great recipe with a focus on the pumpkin pie spices, not the pumpkin itself so much. It's made me a convert to baking with pumpkin!)
Sunday, November 1, 2009
Leftover Halloween Candy? Make a new recipe!
Posted by
MsAnnieBelle
Spotted this around the blogosphere - delicious recipes to make with your leftover halloween candy!
- Apple Candy Bar Salad
- Butterfinger Cake Recipe
- Butterfinger Creme Brulee!
- M and M's Crunchy Snowballs
- Leftover Halloween Candy Cake (Pictured above)
- Deep Fried Candy Bars (Healthy, haha!)
- Mock Sushi (uses gummi worms)
- Candy Corn Margarita
- Candy Bar Croissant
Good luck getting rid of all that extra sugar through the great therapy of baking!
Monday, October 19, 2009
Cake Balls of Deliciousness
Posted by
MsAnnieBelle
Cake balls. Don't giggle - they are amazing and incredibly simple to make (for the most part). I first learned how to make them from their originator (far as I know) - Bakerella. Her site is highly recommended if you're into baking - her photos alone are drool-worthy. She's constantly innovating on her major themes (cake balls, cake pops, etc.) in the most creative ways too.
Usually, I make just plain ol' cake balls but I've made some with red velvet as well. I've yet to make any of the cake pops but I'm excited to sometime.
What do you need to make them? The ingredients are the best/easiest part.
These make great crowd-pleasers and they're also excellent gifts. I used flower vases and ribbon from Target to create these beauties which I used as thank you gifts at my last job.
Here's how you assemble these if you're interested in giving them as a gift -
Usually, I make just plain ol' cake balls but I've made some with red velvet as well. I've yet to make any of the cake pops but I'm excited to sometime.
What do you need to make them? The ingredients are the best/easiest part.
- Any variety of cake mix you'd like plus the ingredients to make the cake itself (usually eggs, oil, and water)
- 1 can of Cream Cheese Frosting (I like to use Betty Crocker Whipped Cream Cheese Frosting)
- Melting chocolate
- Decorations (I usually use jimmies/nonpareils as shown in the above photo)
These make great crowd-pleasers and they're also excellent gifts. I used flower vases and ribbon from Target to create these beauties which I used as thank you gifts at my last job.
Here's how you assemble these if you're interested in giving them as a gift -
- Layer the cake balls carefully, one on top of the other, into a tall glass flower vase (that's clean)
- Cut a small square of plastic wrap, just enough to cover the top of the vase
- Wrap the top of the vase with the plastic wrap tightly so that it sticks and keeps the vase sealed
- Tie a nice ribbon around the top (to cover the edges of the plastic wrap) and finish with a bow
Wednesday, October 14, 2009
Blueberry Birthdays
Posted by
MsAnnieBelle
So, at work, I'm the girl in charge of celebrating the crew birthdays every month. Some people have tried to avoid me knowing their birthday like the plague but AH HA.. I am too quick for them. In September we had five birthdays to celebrate AND it was my first event up to bat for this at my current job. Here, in a nutshell, is how I screwed up and then redeemed myself deliciously.
- The week of Fri Sep. 2
Annie's thoughts, "Too early to celebrate- we'll do it later in the month"
- The week of Fri Sep. 11
"I'm too busy to plan and bake some awesome, gotta move out of H-land Apartments over the weekend"
- The week of Fri Sep. 18
"Moving out this week, brain is fried, bakeware is packed!"
- The week of Fri Sep. 25
"Aha, I know, we'll throw an 'Emergency Meeting' and freak everyone out! Then it'll really be a surprise birthday bash with cupcakes." Good thinking, Annie. ZOINK, cue Production Emergency and suddenly this meeting is not so clever and in bad taste. Cancelled.
- Monday Sep. 28
"Now, I got it - at the last minute - but I got it. I'll surprise everyone with OJ and freshly baked blueberry muffins!"
...Anybody know what Monday, September 28 was this year? Yep, it was Yom Kippur. The Jewish Day of Atonement. Definitely had to be out of work all day to fast and atone for my sins. Add one more sin to the list: screwing up on celebrating September birthdays...
But, hark, is that hope on the horizon? Yes, it is. On Monday, October 6th - I did manage to redeem myself with made-from-scratch-melt-in-your-mouth-can't-believe-how-much-blueberries-cost-these-days muffins at our weekly crew meeting! They were so craveable that no one complained that it was, in fact, October. I topped everything off by sharing anonymously-submitted "favorite things" about each of the Birthday people. It was a rockin celebration in the end.
Here is how you can make these wonderfully redeemable muffins the next time you almost screw up like I did:
Blueberry Birthday Breakfast Muffins
excerpted from this recipe on AllRecipes
8 Servings
Ingredients
- The week of Fri Sep. 2
Annie's thoughts, "Too early to celebrate- we'll do it later in the month"
- The week of Fri Sep. 11
"I'm too busy to plan and bake some awesome, gotta move out of H-land Apartments over the weekend"
- The week of Fri Sep. 18
"Moving out this week, brain is fried, bakeware is packed!"
- The week of Fri Sep. 25
"Aha, I know, we'll throw an 'Emergency Meeting' and freak everyone out! Then it'll really be a surprise birthday bash with cupcakes." Good thinking, Annie. ZOINK, cue Production Emergency and suddenly this meeting is not so clever and in bad taste. Cancelled.
- Monday Sep. 28
"Now, I got it - at the last minute - but I got it. I'll surprise everyone with OJ and freshly baked blueberry muffins!"
...Anybody know what Monday, September 28 was this year? Yep, it was Yom Kippur. The Jewish Day of Atonement. Definitely had to be out of work all day to fast and atone for my sins. Add one more sin to the list: screwing up on celebrating September birthdays...
But, hark, is that hope on the horizon? Yes, it is. On Monday, October 6th - I did manage to redeem myself with made-from-scratch-melt-in-your-mouth-can't-believe-how-much-blueberries-cost-these-days muffins at our weekly crew meeting! They were so craveable that no one complained that it was, in fact, October. I topped everything off by sharing anonymously-submitted "favorite things" about each of the Birthday people. It was a rockin celebration in the end.
Here is how you can make these wonderfully redeemable muffins the next time you almost screw up like I did:
Blueberry Birthday Breakfast Muffins
excerpted from this recipe on AllRecipes
8 Servings
Ingredients
- 1 1/2 cups all-purpose flour
- 3/4 cup white sugar
- 1/2 teaspoon salt
- 2 teaspoons baking powder
- 1/3 cup vegetable oil
- 1 egg
- 1/3 cup milk
- 1 cup fresh blueberries
- 1/2 cup white sugar
- 1/3 cup all-purpose flour
- 1/4 cup butter, cubed
- 1 1/2 teaspoons ground cinnamon
- Preheat oven to 400 degrees F (200 degrees C). Grease muffin cups or line with muffin liners.
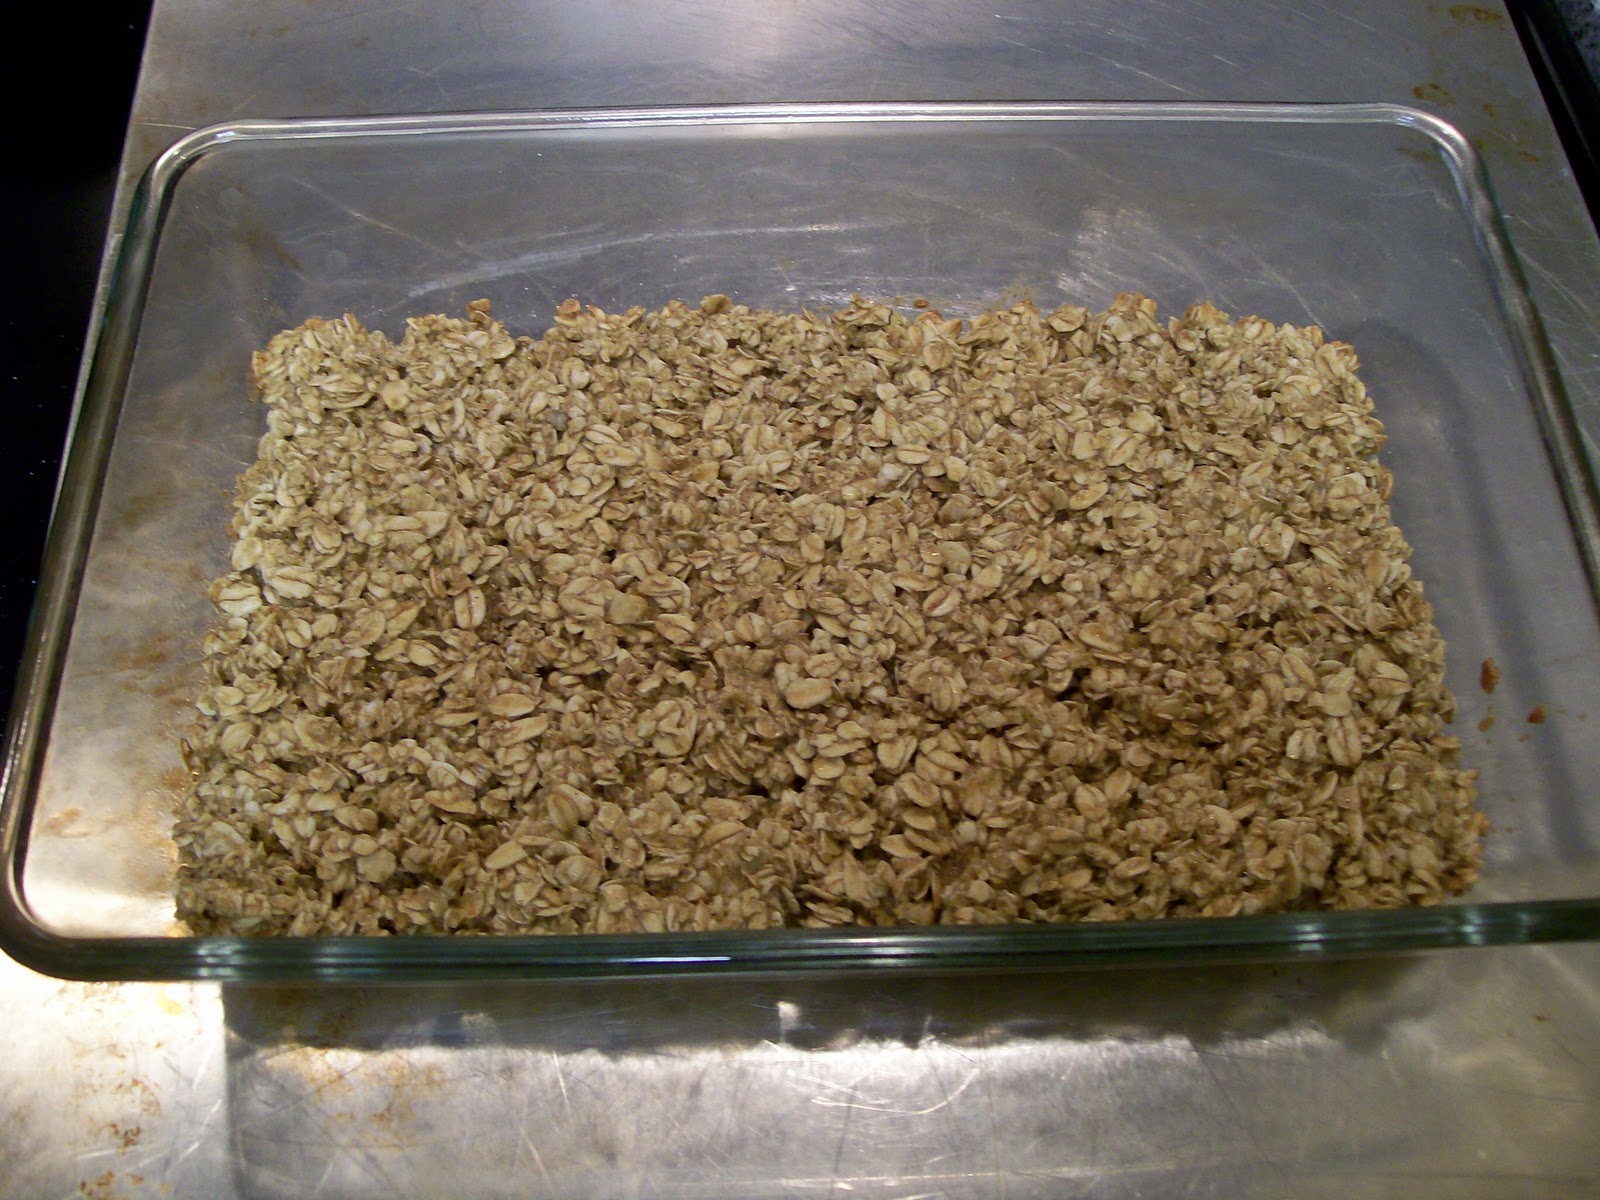
- Combine 1 1/2 cups flour, 3/4 cup sugar, salt and baking powder. Place vegetable oil into a 1 cup measuring cup; add the egg and enough milk to fill the cup. Mix this with flour mixture. Fold in blueberries. Fill muffin cups right to the top, and sprinkle with crumb topping mixture.
- To Make Crumb Topping: Mix together 1/2 cup sugar, 1/3 cup flour, 1/4 cup butter, and 1 1/2 teaspoons cinnamon. Mix with fork, and sprinkle over muffins before baking.
- Bake for 20 to 25 minutes in the preheated oven, or until done.
- Add vanilla- a lot if you like it. I'm a big fan.
- Sub some of the white sugar for brown, it's much more interesting.
- I added cinnamon to the muffin mix as well.
- Have your lovely boyfriend be your Crumb Topping topper!
Thursday, October 1, 2009
Recipes
Posted by
MsAnnieBelle
Cooking, baking, I do it all… baby.
Entrees:
Mint Chocolate Bark
Chocolate Marshmallow Dreidels
Bakerella’s Cake Balls
Mickey and Minnie Cake Pops
Chocolate Marshmallow Dreidels
Bakerella’s Cake Balls
Mickey and Minnie Cake Pops
Other: