Recent Posts

Saturday, October 24, 2009

Hidden Potential: Lovely Little Nightstand

I picked up this cute piece-in-the-rough at Salvation Army last year for a whopping $17 to serve all my nightstand needs. It's really pretty insane how much wood nightstands can run you - $100+!

This time, I used acrylic craft paints and did all the detail by hand. I was a wee bit tired of taping off everything the way I did with the brown nightstand you can see in the photo above as well.


In-Progress without the knob on the bottom.
I re-used the one that came with the brown nightstand!


Aah, nightstand sweet nightstand.


We'll see what happens to this piece in my new place... Stay tuned.

Friday, October 23, 2009

Halloween: Cardboard Box Costumes


This year, I'm attempting to make my first cardboard box costume for Halloween. Apparently at Disney, people take Halloween pretty seriously and there's a major costume contest. I am coming to compete! (I will post a step-by-step of my costume once it's finished, so get pumped.)


Anyway, in my quest to figure out how I'm going to take my relatively ambitious idea and turn it into Halloween fashion glory, I've compiled a rundown around the internet of great sources for anyone hoping to take a cardboard box and make it into something fantastic (that's also fantastically cheap).


If you're curious - here's a few places to look:
Now, back to my task at hand. Expect a post late next week with my Halloween Costume step-by-step sweetness.

Thursday, October 22, 2009

Totally Chic and Affordable Posters

Posters are usually kids and college decoration. Our favorite artist, or movie, or sports star - there it goes, right on the wall. Scotch tape on the corners, holes torn from tacks, very nice decoration for the young adult.


But what's a hip 20-something supposed to do? Give up their posters for what Gus calls "boring pictures of flowers" framed with mats? Pretend that we'd rather look at a modernist circle painting than the biggest size Star Wars poster that's on the market? No, I say!


Here's a round-up of posters that are just as amazing, inspiring, and totally awesome as any piece of art (and usually cheaper too!)

ORK POSTERS

Los Angeles Poster in Blue, 24x36", $22
They've got tons of major cities: LA, NYC, Chicago, Philadelphia, and more- compelete with all their neighborhoods! There's even one that breaks up the chambers of the human heart. At a huge size, 24x36", and incredibly reasonable price - they are a steal. I'm planning to use one in my new apartment.

THE POSTER LIST


Courage my love, 12x18", $10.99
Keep Calm and Rock On, 12x18", $10.99 (also available in 18x24")
The Poster List is great for really fun but kind of chic posters at killer rates and deals. Right now, they have a special going where you can pick any 2 12x18" posters for $20. They change up their designs quite frequently, but I particularly like their rockin' take on the uber home decor famous "Keep Calm and Carry On" poster (which is featured below).

ETSY

Posters available from Etsy user Sfgirlbybay in several colors;
16x23" for $23
Interested in this poster you may have seen all over the home decorating blogosphere? I recommend buying it on Etsy from sfgirlbythebay or any other of the many awesome Etsy retailers selling similar posters. Etsy is an incredible online mecca of every cool handmade product on the market. The sellers are friendly and reliable and (if you ask me), it's way more lovable and personalized than eBay. I'll do a post about in the future and some of my faves.

MOVIE POSTERS 
www.movieposter.com 


Reprint of the poster for "Charade," 26x35", $14
Why not find a fabulously design vintage movie poster? Or better yet, how bout one in another language? You can find originals at Posteratati if you're willing to spend a few dollars.
Also: not to be confused with movieposters.com, I'm a big fan of Movieposter.com because it was the only place I could find the above poster for this somewhat rare movie at a reasonable price tag. It was totally affordable and I'd highly recommend them - they sent me a FREE poster from North by Northwest just for ordering from them. Freakin' sweetness.


Or! MAKE YOUR OWN POSTER!

Wednesday, October 21, 2009

Working for Disney Animation

So what's that like? You may wonder.

Today, I wheeled around a red wagon full of candy. On Saturday, I had to find fifteen whoopie cushions for work.

And... that's what it's really like to work for Disney Animation.

Tuesday, October 20, 2009

Great DIY Photo Gifts


I'm a big fan of giving gifts that involve photographs. Recently, my aunt started asked me for recommendations for making photo gifts for the holidays. It got me thinking, aside from the kinda lame/kinda everywhere photo keychains - it's hard to find AMAZING gifts that involve photos.

Over the years, I've spotted some great ones and wanted to share them with you.


PHOTO GIFTS YOU CAN MAKE YOURSELF

  • Alphabet Photo Postcards - Take a group of friends and have someone photograph you all together making each letter of the alphabet with your body, print each photo/alphabet letter as a 4 x 6 postcard and mail a "secret message" to someone far away; tutorial with pictures hopefully coming soon!
  • Mailable Photo Mosaic - This is a similar project that comes with its own tutorial; This way you are mailing a large photograph in pieces via postcard
  • Photo Blocks - With any photo, you can make an awesome puzzle-esque paperweight that looks very artsy on any coffee table
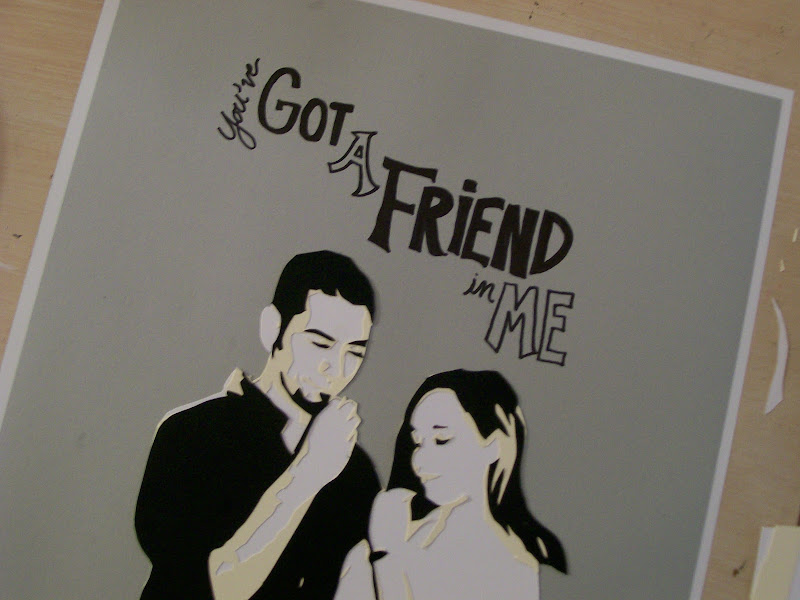
  • Vector Graphics/Vector-Graphic Inspired Paintings - Check out my post and also VectorMagic for a neat way to artsy-up your photos
  • Create a photo journal or notebook - A customized notebook tutorial that will make you wish you'd never dropped $20.95 on a journal at Barnes & Noble
  • Pop-up Photo Cards - Another great photojojo tutorial, make your photos pop with insanely cool pop-up photo cards
  • Photo Fabric Quilt - A recent post on Living with Annie, this duvet cover has panels made with printable photo fabric sheets
  • A Frame-able Photo Mosaic - Using free software on the net, you can create your own photo mosaics. I've linked a free service on here.
PHOTO GIFTS YOU CAN BUY

  • Snapfish Photo Books - I made one of these for Gus for Christmas one year with the theme of travelling. We were long-distance at the time but had made many trips together - each section of the book showcased a different place we'd been to and the book was themed with the e.e. cummings poem "i carry your heart with me"
  • Photo Soda Bottles! - Jones Soda, famous for crazy flavors of soda, will take your photo and customize bottles of soda for you however you'd like. Examples of use - weddings, bat mitzvahs, birthday gifts, etc.
  • Photo M&M's - Most people know by now that you can order customized M&M's with whatever text you'd like on them. They've gotten even more creative and now- you can put your face on an m&m... then eat it! Awesome!
  • Creative Canvases - PhotoWow has a great assortment of effects and genres they can add to your favorite photos to put an artsy spin on them


Got any good photo gifts/projects/sites?
Please pass 'em along.

Monday, October 19, 2009

How to make... fake a Quilt


I'm a bit sewing machine-challenged. I tried a few times, failed miserably, just can't keep the stiches in a straight line unfortunately.


But of course, I wouldn't let such a thing stop me when I came up with the idea of making Gus a comforter. He'd been wanting one for his bed in Los Angeles and I thought "Wow, wouldn't it be great to surprise him with a personalized comforter for his birthday?" Definitely, great idea Annie. Too bad you have no sewing skills to speak of.


What to do when you can't make a quilt? Fake a quilt!


The quilt above is actually made up of the following things: a duvet cover, blue fabric squares, embroidery thread, and fabric photo transfer sheets. It took a surprisingly long time to make but wouldn't had I actually been able to use a sewing machine.


Here's the how to if you're interested in creating something similar. Though it took a long time, this was a really lovely gift and Gus has really enjoyed it.


DIRECTIONS
  1. For the PHOTOS, first identify photos you'd like to use. For Gus, I used 12 photos - each that corresponded to something special about him or about our relationship.
  2. Use a photo program like iPhoto to convert all of the photos to Sepia.
  3. Set up each photo to print at your desired size (the above are 8"x10" since that was the largest I could print from an inkjet printer).
  4. Print each image on printable fabric sheets like these. Try to use ones that are washable - the ones I used for Gus's comforter are not so I'll have to convert it soon to a wall hanging since it can't be cleaned (see a future post for the wall hanging tutorial).
  5. Once you have the photos printed on fabric sheets, peel the protective backing off to reveal the fabric sheet.


  6. Take each sheet and fold each of the edges over slightly, ironing to keep the 'hem' down. This way, all the frayed edges will be folded beneath the panel and won't be seen when you sew it to the fabric square.
  7. For the PANELS, prepare 14" by 14" squares of fabric (any color, your choice). Using an embroidery hoop to keep the fabric taught, sew the photo panel in the middle of the square. I used the most basic stitch you can do in sewing.
  8. Do this for each of the panels until you have all of the panels you want to use on the comforter.
  9. For the COMFORTER, take a Duvet Cover of the size and color of your choice and open it up at the bottom. Pin all of the panels wherever you'd like to the top side of the duvet. 
  10. Using the hoop again, sew all the panels into place by sewing around the edge of each (the same way you did with the photo panels).
  11. To add personalized detail, use embroidery thread. I free-handed all of the designs but you could probably use chalk to trace your details before if you'd like. 
  12. Finally, insert a comforter into the duvet and close the duvet at the bottom. Presto, a gift that took me from Thanksgiving to Christmas and continues to show Gus how much I love him :)


To make sure that no matter what happened to the comforter (like a giant rainstorm) Gus could remember it, I made him a keepsake to go with it using scrapbooking stickers. Good luck with your own photo fabric projects... please show them to me if you make anything :)


Cake Balls of Deliciousness


Cake balls. Don't giggle - they are amazing and incredibly simple to make (for the most part). I first learned how to make them from their originator (far as I know) - Bakerella. Her site is highly recommended if you're into baking - her photos alone are drool-worthy. She's constantly innovating on her major themes (cake balls, cake pops, etc.) in the most creative ways too.

Usually, I make just plain ol' cake balls but I've made some with red velvet as well. I've yet to make any of the cake pops but I'm excited to sometime.
What do you need to make them? The ingredients are the best/easiest part.
  • Any variety of cake mix you'd like plus the ingredients to make the cake itself (usually eggs, oil, and water)
  • 1 can of Cream Cheese Frosting (I like to use Betty Crocker Whipped Cream Cheese Frosting)
  • Melting chocolate
  • Decorations (I usually use jimmies/nonpareils as shown in the above photo)
Ready to bake? Click here for the recipe itself and make sure you've set aside some time. They are easy but a bit time consuming.


These make great crowd-pleasers and they're also excellent gifts. I used flower vases and ribbon from Target to create these beauties which I used as thank you gifts at my last job. 

Here's how you assemble these if you're interested in giving them as a gift - 
  • Layer the cake balls carefully, one on top of the other, into a tall glass flower vase (that's clean)
  • Cut a small square of plastic wrap, just enough to cover the top of the vase
  • Wrap the top of the vase with the plastic wrap tightly so that it sticks and keeps the vase sealed
  • Tie a nice ribbon around the top (to cover the edges of the plastic wrap) and finish with a bow

Related Posts with Thumbnails